Southern California Gardener's November Checklist

The days are becoming shorter, and the odor of cinnamon and pumpkin seed will soon be in the air. It may seem like your garden is headed for its winter nap, but in Southern California there is always something you can do to create your beds as bountiful as the Thanksgiving Day feast. Just a little legwork today will ensure amazing blooms in spring and winter-long produce in your veggie garden.

It’s still prime planting season in Southern California, especially for sailors, Mediterranean plants and cool-season veggies. See below for planting tips and extra garden tasks.

Habitat Design

Cut back (many) perennials. And grasses too. To get sages (Salvia, Perovskia as well as others) search for new expansion pushing against the bottom of the plant, then cut this year’s expansion, leaving 4 to 6 inches of stem.

For warm-season grasses, the last year’s growth typically browns out in the autumn. Cut it back to 4 to 6 inches too.

Las Pilitas Nursery

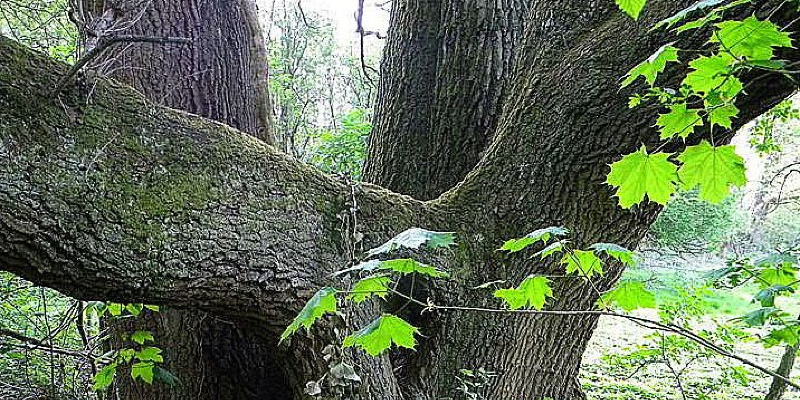
Prepare for winter . Thin evergreen trees before the winter storms arrive to decrease wind resistance and the prospect of storm damage. Hire a certified arborist or read up on proper pruning methods if you are intending to do the task yourself.

Treat peach leaf curl. If leaf curl (puckered leaves which turn yellow or reddish ) was an issue in your peaches and nectarines this year, spray them with lime sulfur once they go dormant.

Caution:Avoid spraying apricot trees, as lime sulfur is toxic for them.

J. Peterson Garden Design

Overseed warm-season lawns with annual rye — or not. Warm-season lawns (Bermuda, St. Augustine, Zoysia etc.) are going into dormancy. When the seasonal siesta and its accompanying brown color are not to your taste, now’s the time to overseed your lawn with annual winter rye grass. Here’s how.

• Give the yard a supershort haircut.
• Sow the seeds per the bundle label.
• Top-dress the place with nice compost.
• Maintain the ground damp until you find the grass sprout.
• Once you’ve got a great 3 to 4 inches of expansion, you are ready for the very first mowing.

Continue planting cool-season veggies and flowers this month. Leafy varieties and root crops love the cooler weather which November brings.

Plant broccoli, Brussels sprouts, cabbage, cauliflower, celery, kale, kohlrabi, mustard, lettuce and other greens. Root crops include beets, carrots, radishes, and turnips. Make the most of the vast range of varieties now readily available in the nursery or through seed catalogs.

The New York Botanical Garden

Sow onions and garlic this month for harvesting next June.

Short-day, aka group 1 or chilly onions, go at the ground this month. Some Fantastic onion varieties for SoCal comprise Imperial Sweet, Grano and Crystal Wax.

Shades Of Green Landscape Architecture

Give berries a bit love this month. Divide and plant last year’s tomatoes or make bare-root varieties from the nursery at the ground before mid-November.

Cut back the old canes of berry crops (blackberry, boysenberry, raspberry, ollalaberry, loganberry etc.) into the ground. Leave fresh smooth-barked canes that grew this year to bear fruit .

Caution: For low-chill raspberries, wait till December or January to cut the canes back.

Margie Grace – Grace Design Associates

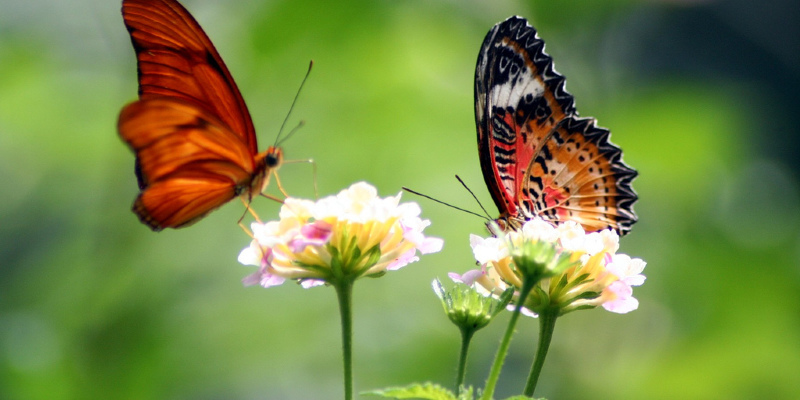
Sow wildflower seeds in anticipation of winter rains. Pick a Western wildflower seed mixture that includes both annuals and perennials, or find your favorite flower seeds and create your own blend.

A few showy wildflower species which do good in our Southern California climate comprise California poppies, larkspur, Lineria, Baby blue eyes, Clarkia, Chinese houses, Godetia and lupine.

The Todd Group

Spring-flowering bulbs. Continue planting any spring-flowering bulbs you didn’t get in the ground last month. Bulbs to plant now include anemones, daffodils, grape hyacinth, ranunculus, scilla, several species of tulips, freesia, Ixia, Sparaxis and Watsonia.

Enjoy the fruits of this season. Beautiful persimmons dangling from trees are hitting their tastiest this month. This bright, autumn-y fruit comes on as the leaves drops, leaving small”lanterns” hanging from the branches that are bare.

See related

Meet the New Super Toilets

Indoor plumbing is possibly the best invention in the history of humankind (with the potential exception of Peeps sushi). Along with the porcelain and chrome toilets that grace most baths in the darkened world work good. While most men and women believe, “When it ai not broke, why fix it?” Some gadget-happy companies — especially in Japan — say, “Why not?”

Fancy electrical high-tech toilets, which the Japanese call super toilets, can be located in more than 72 percent of Japanese households. At minimum they include a bidet attribute and many times a chair warmer.

High-tech features vary, but the majority of the toilets use electricity to give warming, automation and bidet functions.

More: Dream Tubs for Bath Lovers

Kohler

Numi Toilet

The Kohler Numi’s squarish, angled shape, subtle switches and strange automatic lid make it seem like it is anything but a bathroom.

It’s a motion-activated lid which automatically opens when anyone stands in front of it and exactly what Kohler calls “advanced bidet functionality,” which is an integrated air dryer.

The appliance, however, goes beyond the normal functions of a bathroom and adds atmosphere. It’s a heated seat and even a subtle air port that warms the floor in front of the fixture.

It has an atmosphere light and a music player. A touch-panel distant, which attaches to the bathroom with a magnetic docking station, lets you customize each of the settings.

Contemporary Toilets

The leading super bathroom manufacturer in Japan is a business called Toto. And if you’ve ever seen a wonderful hotel in Japan with a Toto bathroom, you know that you’re not in Kansas anymore.

Toto’s most advanced toilets are sold exclusively in Japan, with controllers labeled only in Japanese. The most advanced Toto bathroom you may purchase in the United States is the Washlet S300.

It’s a heated bench, a remote-controlled bidet attribute with air drying and also the option of an oscillating bidet stream of water.

Roca

W+W Toilet

Roca W+W, which stands for “washbasin plus water closet,” uses advanced technology to help the environment.

The water appliance saves, filters and chemically treats the sink you use to wash your hands and brush your teeth then reuses that water for flushing the toilet.

The net result is that you utilize the identical quantity of water in the sink but zero additional water for the bathroom.

More: Dream Showers Enable You To Soap Up In Style | How to Replace a Toilet in an Hour

See related

7 Tips To Merge Your Attic Into a Extra Living Room

In case you have a growing family, you may discover that it’s becoming increasingly more challenging to agree on a living room activity (or a tv station). Appease your household by creating a second area to hang out — a living room attic. Cozy and comfy, an attic living room gives an additional space where you can reunite or watch your favorite sitcom while everyone else is glued into the football match.

Try some of the design hints from a professional to receive your transformation going.

Heather ODonovan Interior Design

Get the ceiling in on the act. “Extend paint or background beyond the walls to the ceiling,” advises designer Heather O’Donovan. This gives sloped walls an even more snug and enclosed feeling.

LDa Architecture & Interiors

Cover up the flooring. Nowadays it seems rare that homeowners wish to forgo hardwood flooring, but attics might be the exception. “This is 1 area I prefer carpet,” says O’Donovan. “It keeps the noise down in anything rooms are beneath the attic making it easy to throw big floor cushions around for additional seating.”

Welcome the sun. In case you don’t already have windows at the area, consider having one installed. Ample natural light will create a cheerier and more inviting area.

Ashley Roi Jenkins Design

Consider a fireplace. Amplify the loft’s natural coziness by adding a fireplace, if at all possible. Contemporary decoration fireplaces are a fantastic option that take up minimum space.

Do not sell furnishings brief. Sloped ceilings often impede visual distance, but don’t feel that equates to the need for miniature furnishings. “Keep furniture low but not modest,” says O’Donovan. “Too small and you have Grandma’s attic, not a modern lounge for you and your pals.”

MN Builders

Do not go crazy with all the tv. Maintain the tv size under control. “Too big, and it can throw away the scale of everything in the room,” says O’Donovan. “I wouldn’t go much bigger than a 32-inch.”

Jacob Lilley Architects

Produce a warm glow. “Chandeliers and reduced — but again, not modest — table lamps provide lovely ambient lighting while working nicely,” says O’Donovan. “Once you carve out a cozy reading nook, you wish to have the ability to see your book.”

More: The best way to convert an attic or basement

See related

Fantastic Design Plant: Globe Thistle

Globe thistle (Echinops rito) is a plant with star power; put it on centre stage in your backyard and it will not disappoint. An herbaceous perennial native to central and eastern Europe and central Asia, it’s well adapted to a lot of regions of the U.S. It’s a dramatic, sculptural plant which features beautifully shaped bicolor foliage and striking blue blossoms. Globe thistle blooms for weeks during the latest period of summer — you won’t need to put this baby in the corner!

Jocelyn H. Chilvers

Botanical name: Echinops ritro
Common name: Globe thistle
USDA hardiness zones: 3 to 9 (find your zone)
Elevation range: To 7,000 ft
Water requirement: Moderate to non
Light requirement: Total sun
Mature size: 2 to 4 feet tall and 2 to 3 feet broad
Fun fact: The genus Echinops derives its name from the Greek word for “just like a hedgehog.”

Jocelyn H. Chilvers

Benefits and tolerances: Bold, architectural type; long-blooming blossoms that are acceptable for cutting or drying; tolerant of full sun, poor soils, heat and drought
When to plant: Spring through fall
Seasonal attention: Unique blue flowers July through October, peaking in late July into mid-August
Distinguishing traits: Stiff white blossom stems emerge out of a foundation of large, deeply lobed, spiny leaves that are green on the upper surface and white and woolly below. Blue blossoms form a round inflorescence that looks like a golf ball coated with blue bugle beads.

Jocelyn H. Chilvers

The best way to utilize it. Plant globe thistle as an accent plant in a perennial border, cottage garden or garden. Its coarse texture and intriguing blooms stand out in both formal and informal designs. Position globe thistle where you can enjoy seeing the bees and butterflies which will come to visit. You’ll also wish easy accessibility to take cuttings for new bouquets and dried arrangements.

To wash the globes, cut them until the flowers fully open and then hang the stems upside down.

Globe thistle will show to best advantage when it’s paired with plants with contrasting foliage textures, such as daylilies (Hemerocallis spp), tall garden phlox (Phlox paniculata) and ‘Powis Castle’ sage (Artemesia ‘Powis Castle’).

Group some lower-growing plants — like sun rose (Helianthemum nummularium) or Missouri evening primrose (Oenothera macrocarpa) — round the bottom of earth thistle to hide the lower foliage, which can find a bit ratty looking.

Jocelyn H. Chilvers

Planting notes. Place world thistle in full sun and plant it in well-drained soil. Porous, sandy loam is perfect, but world thistle is fairly elastic. Plants may require staking if they are grown in a rich, moist soil. Deadhead to reduce self-sowing.

See related

Pacific Northwest Gardener: Things to Do in September

I want to enjoy my garden, not be a slave for it, and with five acres to perform, which means planning. Whether you’ve got a patio garden or a estate, your garden will be greater if you take some time to put down your pruners and pick up your laptop and camera. September is the perfect month to take stock of everything did nicely, what was a disaster and what needs changing.

Take these lawn jobs at a leisurely rate. September is the past reliably warm gardening month for those of us in the northern parts of this region, so enjoy it!

Milieu Design

Time to take stock. As you walk round taking care of the couple seasonal chores I list, be sure to take notes on which plants thrived and then fizzled out. Can it be due to lack of water? Infection? Overcrowding?

Are there any areas of your garden that you are just not satisfied with but can not figure out why? Take some brutally honest photographs. These aren’t the ones to talk with the world on Facebook, but may be taken into a nursery professional for advice. It may be that some plants need thinning, or there isn’t adequate foliage interest to hold the vignette together throughout the year.

Hiring an experienced garden coach or consultant also could save you time and money, since they can help you identify the problem quickly and provide lots of solutions which integrate nicely with the rest of the picture.

Jocelyn H. Chilvers

Plant cool-season edibles. Kale, cabbage, spinach and Swiss chard are favorites. Radishes and lettuce also will have plenty of time to grow and be harvested prior to the cold weather comes.

September is also the ideal time to plant onions and garlic. Cover those with bird figurines raised a few inches with blocks of wood or old nursery pots. Birds appear to like to peck at these emerging tips! Once the roots have established, the netting can be taken off.

For more great ideas on the best way best to grow cool-season crops, enjoy this ideabook.

Gardeners at the marine Northwest will find Growing Vegetables West of the Cascades by Steve Solomon invaluable.

Matthew Cunningham Landscape Design LLC

A bit light tidying. September is the best time to putter. Continue to clip dead blossoms from earlier-blooming perennials, shrubs and roses, but make a few seed heads on plants like coneflowers and Black-eyed Susans for the birds to enjoy.

Remove mushy or diseased leaves promptly (make sure you check at ground level) to reduce the danger of disease.

Le jardinet

Container care. Your containers need to need refreshing just rarely before late October.

Here, begonia ‘Bonfire’ (Begonia boliviensis ‘Bonfire’)proceeds to burst with orange blossoms, richly supported by the vivid foliage of coleus (Solenostemon scutellarioides) and sweet potato vine (Ipomoea batatas cvs). A walnut (Acer palmatum ‘Arakawa’) takes centre stage and shortly will add fall color to the blend.

Michelle Jacoby, Changing Spaces

If your containers look in need of a tiny pick-me-up, switch out exhausted annuals with seasonal shade spots like asters, chrysanthemums (like the burgundy ones pictured here) or cape plumbago (Plumbago auriculata). Be sure to select colours that blend with the staying container plants for a cohesive look. (Wait till October to add spring bulbs and fresh fertilizer — tips on that next month.)

Le jardinet

If all else fails, cheat! Nestle a colorful pumpkin or gourd into a container to add some life to a summer style.

Smith & Vansant Architects PC

Lawn care. Lawn, pasture, meadow or area — just how can you specify your mountainous areas? We have all four, and when I’m truthful, their definition is mainly dependent on the amount of time and care we give them.

Amazon

Dr. Earth Super Natural Lawn Fertilizer – $63.69

For those of you that are better yard care givers than that I am, this is the month to fertilize in order to develop a strong root system for winter. Organic fertilizers frequently incorporate a blood and bone meal component that consumers love, therefore keep Fido indoors until the clogs have watered it in well. Select a slow-release product.

Prevent ‘weed and feed’ products, that can be an unnecessary expenditure and add herbicide to your whole lawn. Accept a number of weeds, spot treat in the event that you truly need to, but focus on building a healthy yard to outcompete these weeds.

Mow as necessary, but onto a moderate-high setting; don’t scalp it! Leave the clippings as mulch to help conserve moisture and add nutrients back into the ground. When leaves begin to scatter upon the grass from neighboring trees, mow them over too. (When there are plenty of leaves, it’d be better to rake them up and put them into the compost pile).

yardbutlerstore.com

Manual Lawn Spike Aerator – $27.30

Getting air to the roots of grasses is vital, so if you did not do this in spring, then do it today. Many programs are available to make light work of aeration, but for smaller lawns, a hefty whack with a garden fork or spike aerator like this one will do the job just fine.

Most lawns from the U.S. Pacific Northwest region include cool-season grasses, so fall is the ideal time to overseed any sparse regions or create a new lawn. Be sure to do this at least one month prior to your expected first frost.

Witt Construction

Love it! Now it’s time to settle back and relax, enjoying the last of the summer sunshine before shifting flip-flops for boots.

More: Guides for your Northwest garden

See related

Fantastic Design Plant: Eastern Redbud

I admit bias; the Eastern redbud is just one of my all-time-favorite trees. Oklahoma agrees, since the Eastern redbud is its condition tree. This attractiveness, indigenous to the U.S. and Canada, explodes with deep pink color in spring. When I lived in Virginia the blooms were a sign that said, “This is the best weather of the year right now. Enjoy it.” Additionally, because it’s heart-shape leaves, it had been quite easy to spot on plant class quizzes. Obviously, who doesn’t love a heart-shape foliage, plant class quizzes or maybe not? One thing you might not enjoy about such trees would be the 3-inch-long seed pods that they finally fall on the floor, but that’s the amount of attractiveness, and adorable little chickadees count on them for food. Fall is a prime time to plant this shrub.

LLC, Ream Design

Botanical name: Cercis canadensis
Common name: Eastern redbud
USDA zones: 4 to 9 (find your zone)
Water requirement: Prefers moist, well-drained lands but can survive in drier conditions. You ought to water it through warm summer days.
Light demand: Full sun to partial shade
Mature size: 20 to 30 feet tall and up to 35 feet broad
Benefits and tolerances: The shrub is quite tolerant of poor soils, a few drier conditions, urban states and various amounts of shade. It’s susceptible to wilt, fungus, cankers and a few pests.
Seasonal interest: Beautiful deep pink blooms in spring; yellow leaves fall
When to plant: Following the last frost in spring or fourteen days before the first frost in the fall

Liquidscapes

Distinguishing traits. These indigenous trees have been covered in deep pink blooms in the spring; blossoms pop up in clusters along the stems, branches and at times even along the back. Eastern redbuds can flourish in filtered light, so the color they provide is rather a shock to see in a woodland understory.

Mature trees have a rounded shape, however when outside in the open, the oldest trees can distribute, getting wider than they are tall.

When they are not in blossom, enjoy their distinctively heart-shape leaves. The leaves are a reddish-purple shortly following the blossom, quickly turn a beautiful shade of green to the summer and after that turn yellow in the fall.

The shrub produces seed pods that finally fall. They are great for wildlife, even as they are a winter food for birds. Birds enjoy nesting in such trees.

Rugo/ Raff Ltd.. Architects

How to utilize it. When I lived in Virginia, I loved going up to Monticello in the spring to see the white flowering dogwoods and pink redbuds prospering in unison. They provided a gorgeous decorative coating underneath the canopy trees (they’ll need filtered sunlight to survive).

Naturally, redbud’s beauty also makes it a fantastic ornamental shrub to utilize solo in your yard or as a tree.

A street tree in Atlanta. As young trees older, you might need to do some pruning for clearance along the sidewalk and also for parked cars.

Field Outdoor Spaces

Planting notes. The redbud can develop in a vast array of soils, such as clay, sandy and loamy. But, wealthy loose soil is best.
Dig a hole the same depth as and 3 times the diameter of the root ball. Loosen the roots and place the root ball in the hole.Add soil, packing it down and watering as you move. Ensure you keep the tree watered for the first year.If you reside in a climate with heavy snowfall, you need to use a tree wrap to keep it protected during the first winter.

Liquidscapes

That’s interesting. Founding fathers Thomas Jefferson and George Washington were fans of the Eastern redbud and planted a lot of these on their respective possessions, Monticello and Mount Vernon.

See related

The Way to Work With a Remodeler

Lifestyles evolve over time, and so do our homes. Infants are born; children grow up and leave the nest; aging parents join the household. And even when a home functions just how it needs to, changing design trends and new materials can render older spaces looking somewhat cluttered and dusty.

That’s where a professional remodeler comes from. Read on to find out what a remodeler can do for you and how to get the maximum out of your own experience.

Michael Robert Construction

What a remodeler does: A remodeler is a contractor with a concentration on creating structural alterations to an existing house or building. He or she implements architectural plans and sometimes provides residential design services. Remodelers also perform a number of the same duties as a general contractor, such as hiring and overseeing subcontractors and sourcing materials. Many states have certification requirements for remodelers.

When to hire a single: If you’re planning a significant change or improvement to your house, hire a remodeling contractor to guarantee the integrity of the design and construction, and also to ensure you will meet current building codes. Remodelers are also well versed in cost estimating, legal problems and other nuts and bolts concerns.

What it will cost: Remodelers’ fees take many distinct forms, and costs vary widely depending on the nature of the work and the materials utilized. Although some may agree to a flat fee, others charge a percentage of their total labor and materials costs (typically 10 to 15 percent, but sometimes as large as 25 percent).

It’s worth noting that, as with many facets of home improvement, you get exactly what you pay for — a remodeler who may charge more but has profound expertise and a sterling reputation is usually worth the excess price. Do not hire according to the lowest estimate alone.

Where to locate one: Read the directory of specialists on or listings from the National Association of the Remodeling Industry (NARI). Check to see if there are remodelers’ trade organizations in your area as well. Another professional you’re working with, such as an interior designer, also may have the ability to give you leads.

Should you detect that one of your neighbours is doing work (remodelers frequently place a sign with their name and emblem in the front yard during construction), inquire if they’d recommend the professional they have hired.

Bosworth Hoedemaker

Have a clear idea of what you want. Maybe you’re looking to double the size and change the footprint of an obsolete kitchen, or perhaps you want to convert your attic into a guest suite. Consider the reach of the project you have in mind and generate a ideabook or cull other design resources for inspiration. Do not worry too much about if every detail is achievable; your remodeler will help you brainstorm alternatives if it isn’t.

Interview the candidates in your short listing. Not just should you confirm that they have experience with the kind of project you’ve got in mind, but you’ll also need to be certain that you’ve got a good rapport and communicate well.

Ask detailed questions about job history, professional instruction and affiliations, licensing requirements and insurance, and get the names of a couple references. If lead paint is an issue in your house, you may also should confirm that the remodeler is lead-safe certified under EPA guidelines.

Visit an in-progress job site. Request to fall by a few of the remodeler’s current job sites. This may give you a sneak peek at what your experience may be like. Is the site clean and well preserved, and does function seem to be progressing in an orderly manner? Look closely at the character of the construction and also the attention to detail as well.

Ventana Construction LLC

Be sure you understand the details of the contract. Once you’ve chosen a pro, examine the contract in detail to be certain you won’t encounter any surprises. Besides basics such as contact information for the remodeler and others who are supervising, license number and insurance information, it should incorporate a start-to-finish schedule, a materials list with price breakdowns, payment terms, alter order specifications, patterns or detailed sketches and provisions for conflict resolution. Do not be shy about asking the remodeler to describe any information you find confusing.

Confirm that areas of the house the undertaking will affect. You might be remodeling a single area, however the temporary disturbance could extend to adjoining spaces. Electric wiring and other behind-the-walls systems may be impacted. Ask the remodeler which rooms the work will touch so that you can prepare accordingly.

John Kraemer & Sons

Do your part to produce the remodeler’s job easier. Clear furniture out from affected rooms, be certain the work team has adequate space to park and transport stuff, and also make provisions to maintain pets and children well out of the way. Give the remodeler an idea of your family’s daily schedule and stick to it as closely as possible to minimize disruptions to the workflow.

Make sure you’re easily reachable even when you’re not as onsite. And should you decide to make a shift along the way, try not to haul out the decision-making procedure, which may throw the schedule significantly off schedule.

Do not wait to listen to problems. Few, if any, remodeling projects reach the finish line without a few bumps and snags along the way. Speak up when a problem arises, while it’s substandard work quality, a communication breakdown or a subcontractor who leaves the site in disarray. That way, you and the remodeler can agree on a plan to solve it as soon as possible, before work proceeds too much — and you’ll feel confident that you’ll be completely satisfied when it is time to make the final payment for the occupation.

More: Find a remodeler near you

See related

Modern Meets Eclectic For Delicious Dining Rooms

I really like midcentury modern layout, but I strongly believe that it needs to be tempered with furniture from other eras and individual things to avoid looking like a set from Mad Men.

In fact, I think that all rooms should include personal products. Design is all about reflecting your personality and way of life. It needs to be beautiful and comfy above all other things.

All these 10 dining rooms contrast starkly with conventional, cushy dining areas which have matching upholstered chairs and clear color schemes. They’re a little wild (in an understated manner), a little mix and match, and totally relaxed and comfortable. Every one of these is made for lingering over meals and good conversation. Please pass the wine.

Fotograf Lisbet Spörndly

Elements of midcentury design (hello, lantern wallpaper) mix with the farmhouse sideboard, a contemporary light fixture and a lot of mismatched chairs. It should not go together, but it will — and superbly.

Holly Marder

This dining table, made from reclaimed timber, is the ideal complement to a menagerie of colorful chairs. It’s simple and contemporary, but additionally, it has a warm, inviting farmhouse cosmetic.

Croma Design Inc

Easy, clean and very contemporary, this distance is warmed up with its proximity to the living room. Nothing is more casual and friendly than a open floor plan. Also, check out that sculpture, which bring the ceiling down to a more intimate level.

Room & Board

Here’s another contemporary take on the farmhouse feel. The lines are clean and Danish, but the atmosphere is “everybody’s invited for cherry pie.”

Room & Board

The carpet adds so much heat to a beautiful (oh, that natural border table) but stark dining room. A little cozy goes a very long way with midcentury layout. And timber consistently helps with heat.

Dreamy Whites

Louis IVX matches Malibu. That is pretty traditional French nation, but with no frills. The walls and floor give this installment a more contemporary vibe.

This is diverse modern at its best. It features midcentury modern icons such as the Ghost Seat paired with conventional furniture, an eclectic display of art and dollops of color against white. Beautiful.

Emily McCall

A traditional farmhouse dining table and built-in china cupboard are paired with white Panton chairs plus a bare, contemporary appearance. It’s the best of both worlds: stylish and welcoming, casual and slick.

The nuclear age matches soft arches, dark walls and a classic pedestal dining table. It’s very modern without looking overly theme-y.

Watch the rest of the creative house in Omaha

Dufner Heighes Inc

The chinoiserie wallpaper is in stark contrast with the simple (almost Shaker) lines of this furniture. With no this room would appear unfinished.

More:

The Easiest Room to Decorate: The Dining Room

11 Vibrant and Colorful Dining Rooms

Design Chat: Eclectic vs. Collected

See related

Fantastic Design Plant: Iranian Wood Sage

Summer is here and the heat is on, with all the sweet scents of the garden permeating the air. Iranian wood sage (Teucrium hircanicum) is among the summer bloomers infusing landscapes using its deliciousness — both visually and aromatically. Iranian wood blossom is a sunlight- and heat-loving perennial that’s easy on water usage and easy on the eyes, and will keep you seeing magenta from June until September.

J Biochemist

Botanical name: Teucrium hircanicum (syn. Teucrium hyrcanicum)
Common names: Iranian wood blossom, Caucasian Germander
USDA zones: 6 to 10 (find your zone)
Water requirement: Moderate
Light requirement: Total sun
Mature dimensions: 18 to 24 inches tall; 12 to 18 inches broad
Benefits and tolerances: Flowers attract butterflies and bees; heat and drought tolerant
Seasonal attention: Summer blossoms
When to plant: Plant seedlings in spring or fall; self-sows profusely

J Biochemist

Here we view Iranian wood sage in a raised planter layout by Piet Oudolf, alongside Sea Holly (Eryngium spp) — both favorites of the superbly manicured bouquet or garden.

Distinguishing attributes. Different magenta spikes arise in late spring and continue to bloom through summer and into fall. Projecting above mounding leaves, they are the initial features of the plant to capture the eye. But let’s not neglect the foliage. Fuzzy, green sage-like leaves emit a rich fragrance that’s enhanced by heat and sunlight exposure. The evergreen leaves are brilliant yet work as a acceptable backdrop to the floral scene which simplifies the plant.

The best way to utilize it. When planted en masse these plants create a billowy sea of pink and green. Architectural yet soft, they blow nicely in the wind and create the best “undesigned” garden impact. Iranian wood sage grows well in containers and provides profile diversity for a lively layout. Line a path or fill out a stone garden.

J Biochemist

Planting notes. Plant Australian timber blossom in full sunlight — partial afternoon shade will be a advantage in extremely hot climates. While it can grow in soil conditions which vary from rugged to ordinary or even marginally moist, make sure the soil is fast draining. This plant endures if overwatered.

Enrich the soil with organic material before planting. This plant does not require an excessive amount of maintenance or oversight once it is established. You can expect to find blossoms even the first year.

More: Great layout blossoms and plants, trees and grasses.

See related

Lift a Room's Appearance Having a DIY Pendant Light

A number of lighting choices in a room can take it from dull to lively . We have numerous lighting fittings in our home — numerous so-called “boob lights,” that is. I believe the standard of the builder lighting the Achilles heel in room layout. We have at least one in each room of our home. Our kitchen boasted three — one in the middle of the room, just over the sink and one in the nook. We knew we had to replace them.

Meg Padgett

The location over our kitchen sink was our first stop in the overhaul while I would love to complete a marathon elimination of all the lights. The existing light’s proportions were all wrong, and two miniature pendant lights could be just the right touch of beauty and tranquility. While this was not the room’s finishing touch, it sure did help place the end in sight.

Meg Padgett

We made our pendant lighting.

Materials used:

Westinghouse Oil-Rubbed Bronze Mini Pendant Lighting Kit
Westinghouse Safe-T Pan
Glass shade
Utility knife
Drill

Meg Padgett

After turning off the power, we removed the existing light over the sink.

Note: Constantly consult with the local building codes when planning any home improvement project.

We referenced Black & Decker’s The Complete Guide to Wiring, which offers detailed step-by-step instructions for many electric jobs and is fully compliant with the most recent National Electrical Code.

Meg Padgett

We measured and marked the middle of where our pendant lights could be installed. We chose to center them over each side of our double sink.

Meg Padgett

We assembled the pendant lighting kit according to the manufacturer’s instructions and attached the glass shade. There are numerous types of colors available at big-box stores, but we purchased ours from a local thrift store for less than $1.

The pan kit comprises its own hardware and instructions for mounting.

Meg Padgett

We traced around the perimeter and focused each pan on our marks.

Meg Padgett

We cut out the circular pieces using a utility knife.

Meg Padgett

We first predrilled a hole in the middle of all which was utilized to feed through the electric wiring to mount the Safe-T Pans. Then, referring to the manufacturer’s instructions we mounted the pans to the ceiling.

Meg Padgett

If you are not comfortable doing your own wiring, call in an electrician. Otherwise, measure the duration for each light and cut any extra wiring off, leaving a few inches extra for leeway.

Together with the power still turned off, we fed the electric wiring through the predrilled hole and connected it to the pendant light’s wiring. (Refer to an up-to-date wiring manual along with the pendant kit for certain instructions on working with electrical wiring, and for troubleshooting assistance.)

Then we turned the power back on and checked that the wiring has been connected correctly.

Meg Padgett

Finally, we patched the hole left from the original lighting and primed and painted the ceiling.

Meg Padgett

With these beautiful pendant lights and illuminating my favorite workspace — we’ve got just one more step to complete our kitchen remodel: installing crown molding and door trim.

See related