Landscaping With Foxtail Palms

Native to Australia, the foxtail palm (Wodyetia bifurcata) is a tropical palm-tree with lush foliage, vivid white flowers and amazing red fruits. Accustomed to the environment of tropical areas palms are frequently observed in in the gardens of beachside communities. The trees can tolerate an atmosphere with large wind atmospheres, full-sun and problems. Lush palms and Hardy are an intriguing landscaping addition to your own ocean-side backyard.

Appearance

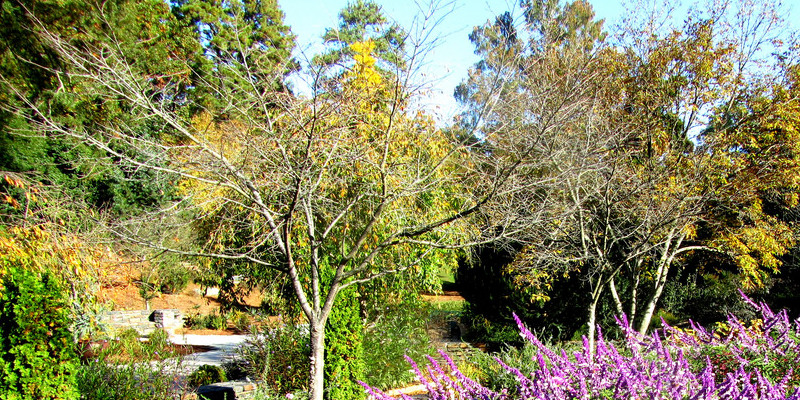
The palm is a tall tree with full foliage. Standing 25 to 40-feet high, the very top of the tree explodes right into a cluster of 8 to 10 green fronds. Setting itself apart from other palm-trees, the palm characteristics hundreds of leaflets that twist in the stem in most directions, making the fox- look that inspired its name that is common. The trunk is slender and slim with grey and brown coloring. The tree blossoms with white flowers that become tiny fruits that are red.

Climate Factors

In tropical climates palms are grown primarily since their introduction to the United States. They prefer areas with warm summers and full sun with plenty of moisture. If problems are dry for long although they are able to tolerate droughts to get a a short period of time, their development is delayed. This result can be prevented by watering. The trees are tolerant to salt and wind, making them a perfect addition to back-yard gardens close to the ocean. Palms could be effectively developed in U. S. Department of Agriculture Plant Hardiness Zones 10 through 15, in accordance with the web site that is Learn2Grow.

Design Tips

Making use of their lush foliage palms offer an intriguing addition to any sort of backyard. They look best when planted in little clusters near other kinds of shrubs and plants. They also make and remarkable look as a focal point surrounded by non-tropical crops and flowers or lining a driveway. When planted across the again fringe of of a lawn, using their total foliage palms can supply a little privacy.

Maintenance and Care

Scatter mulch throughout the foot of the tree, extending as significantly as the tree’s canopy, if feasible. Mulch AIDS in preventing weed over growth, retains the location hydrated and protects the palm’s trunk from injury. The soil round the tree should allow for draining that is sufficient, along with a palm fertilizer that is well-balanced retains the tree wholesome. Since palms are regarded a self-cleansing species, pruning is unneeded. As lifeless leaves are accumulated by the tree, it is going to simply fall the particles to the ground. However, little fruits that drop to the bottom at the conclusion of the growing time does be developed by the pal M; these fruits needs to be removed in the ground frequently to avoid chaos.

See related

The best way to Kill a Eucalyptus Tree

Native to Australia, Eucalyptus trees (Eucalyptus globulus) have become an invasive species in in the USA, for example, state of California. These trees grow. One of the greatest methods to to manage the spread of the invasive species would be to kill the tree by drilling to the trunk before implementing a herbicide or frilling the bark.

Mix up a batch of triclopyr or glyphosate herbicide at 50-percent focus by following the directions included with all the herbicide.

Pour a few of the herbicide solution right into a spray bottle that is handheld so it’s prepared to use when you you finish planning the tree-trunk and set it apart.

Drill holes to the trunk of the eucalyptus tree in a 45-degree angle using a 16-inch drill-bit that is spade as well as a power drill. Space the holes about 3″ apart across the circumference of the trunk. Each hole should be at least 2″ deep so that it cuts the internal tissue of the tree, to the cambium.

Set the spray bottle that was handheld to the environment that was squirt and use it to fill.

Allow weeks for the herbicide solution to soak to the cambium of the eucalyptus tree. Through the spring and summer months, it will take between four and two weeks for the tree to die.

Two parallel grooves into a depth of at least 1-inch across the circumference of the eucalyptus tree using a chain saw. This tree- technique is called girdling.

The herbicide answer in the trunk, to the grooves, or girdles, wetting the cambium that is exposed entirely. Use a chain saw or hatchet to remove the bark involving both girdles in case you choose not to use herbicide to destroy the tree.

Create a collection of downward-angled cuts all of the way throughout the circumference of the eucalyptus tree-trunk having a hatchet of bark. This approach is called frilling, plus it’s most readily useful utilized to trees over 4 4″ in diameter.

Before the cambium is carefully moist the herbicide combination to the cuts, or frills. With respect to the diameter of the tree, this technique can t-AKE weeks to eliminate the tree.

Cut the lifeless tree utilizing a chain-saw down and dump the trunk as wanted.

Grind the stump down to walk out utilizing a stump grinder.

By following the producer directions apply a stump remover. Killing the stump is a vital step in killing a eucalyptus tree because, like several trees, eucalyptus create new crops and can sprout in the trunk.

See related

The best way to Use Graywater for Gardening

A group of of four can generate of it going to waste down the drain. This is an invaluable source it is possible to use in your backyard and lost water is called graywater. As opposed to letting the drain is circled by it, acquire it. It can help you save money in your water bill and lead to a life-style that is sustainable.

Water in buckets that are big. Scoop use it to water your garden, trees or bushes and left-over bathwater into buckets. Sinks were left over from by buckets with water when you clean your fingers and brush your teeth. Use this water to water plants in your lawn too.

Put the conclusion of your automatic Washer hose right into rain barrel or a big bucket to to get the water as it drains through the cycle. When the rain or bucket barrel is complete, use the gray-water to irrigate your garden or plants in your yard.

Test your soil frequently. Compounds and the chemicals in graywater from laundry soap, dish soap or hand soap can alter the pH level of the soil in your lawn. Discontinue using graywater in these types of areas of your lawn in the event the pH level starts to improve, or in the event that you observe your crops enduring.

See related

The best way to Get to Bloom

Autumn clematis (Clematis dioscoreifolia or C. terniflora) is a flowering vine that will grow to 30-feet tall in Sunset’s Environment Zones 4 through 11 and 14 through 24. A wholesome autumn clematis which is planted and looked after correctly blooms abundantly in autumn or late summer, creating 11/4 inch diameter aromatic flowers that are white. It’s is among the the vines that are simplest to develop effectively but there are some steps you are able to take for an enormous floral show. When planted in the fall clematis establishes effectively.

Clear an area where it receives at least six to eight hours of sunlight each day, to plant. Check the soil pH in the planting site. Make certain it’s a pH of under or 7. Adjust the soil pH when it’s above 7 by including sulfur or mixing A3- to 6 inch- layer of peat moss to the soil using a grime shovel. Add a 3- to 6 inch-deep layer of organic matter such as well-aged cow manure, compost or peat to sandy soil for enhanced nutrient amounts and moisture-retention abilities.

Dig the planting hole into a depth that permits for three or four inches of soil over the root mass to help keep them cool. Water it generously to to be in the soil round the roots. Spread a 4- to 6 inch depth of mulch like shredded pine bark across the vine therefore it addresses the root zone and 6 to 8-inches of undisturbed soil throughout the root zone. Keep the mulch one to two inches away in the stems of the vine. Place something comparable over or before the root zone shaded or a rock. Shade is required by vines at their roots to prosper.

Erect a trellis supporting the vine. Water the vine twice or once per week in the absence of rain. Don’t give fertilizer to it. Plant some shallow rooted annuals or perennials in the spring to supply shade or depart the rock set up before it. When it gets tall enough to reach affix the vine to the trellis with twine. Tie the twine loosely to a void injuring the vine stems.

The vine back to TO AT LEAST ONE foot-tall in cold temperatures or late drop after it h-AS been expanding for 12 months. Make the cuts with sharp hand pruners leaving two development buds on each and every stem. Continue to water the vine twice or once every week and don’t give it fertilizer. Prune the vine down to your height of 2 to 3-feet each yr in late fall throughout the cold temperatures or in extremely early spring subsequent to the next year.

See related

The best way to Compost Coffee Grounds

Simply because they’re full of nitrogen, which in turn causes causes the reactions in the compost that that creates warmth, based on Science Daily, coffee grounds are an outstanding addition to your own compost pile. The warmth kills most of the pests and germs which may be present, and keeps the materials earnestly composting over an extended period. Putting coffee grounds in compost repels rodents and other creatures. The materials may be utilized as a mulch to enhance the value of your garden soil besides cutting back on landfill waste.

Store coffee-grounds for composting in a air tight container until time.

Add the coffee-grounds immediately to the backyard soil as a soil enrichment. Spread them on the area and protect them using a gentle layer of mulch.

Compost coffee-grounds in a compost pile or compost by layering them bin. Add coffee-grounds in a ratio of 1 to-4 using the other -based waste therefore the nitrogen- grounds constitute only one quarter of your compost pile at any time that is given.

Turn your compost pile. Use the materials to enrich your garden soil.

See related

How to Correctly Irrigate for Citrus Fruit Trees

Tree irrigation is an essential component of a crop that is productive, particularly in areas where character can not usually be relied upon to supply most of the water required for for the procedure that is developing. Citrus grows best in Sunset’s Environment Zones 9 and 8 and 12 to 27, with fruit- trees requiring fruit producers and summer requiring summers. Whether your trees are maybe not or fruiting, they are able to be a stunning addition to any home landscape.

Calculate the quantity of water your tree that is citrus will will need based on the time of yr as well as its dimensions, sort, the soil where it stands. As an example, an orange tree using a 10-foot canopy will will need about 14 gallons of water per day in soil through the month of August. A tree of the same dimensions will will need about 4 gallons per day. Refer to your citrus irrigation chart to figure out what what your trees will will need.

Wait for the soil before watering citrus trees that are proven to dry completely into a depth of approximately 4″. Remove the spray nozzle out of your garden hose and install a more effective water-conserving soaker attachment. Allow water to gradually pour the soil within so that it’s adequate time and achieve the soil as an alternative to flooding and remaining on top. This this system will conserve valuable water and offers outcomes that are more efficient for the trees.

Irrigate your citrus trees in much the same 2-3 times weekly through the season. After watering, the soil needs to be moist but perhaps not damp. Continue the irrigation method throughout the winter months in the event the trees are put through drought, large winds or warm sunshine -like problems.

See related

The best way to Harvest Red Leafy Lettuce

As it is possible to harvest it several times through the season, leaf lettuce gives a constant supply of clean greens. Leaf lettuce grows 14 and prefers cooler temperatures. In summer places that are moderate, the slow-bolting red kinds, including Red Sails and Red Fireplace, might create all summer. Harvesting red lettuce correctly encourages development and does not harm the plant.

Harvest the first set of leaves about 4-5 days after planting, when the leaves are about 6″ or greater in total. Cut the leaves in the plant using a clear knife near their foundation.

Cut outer that is clean leaves twice or once weekly, depending how quickly the plant grows and replaces the foliage. Leave the the inner foliage set up to carry on creating and developing.

Once the plant reaches full-size, remove the leading third of the whole plant together with the knife or shears. Harvesting in this way encourages a brand new flush of development.

Before it bolts, generally before summer temperatures go above above 80 degrees Fahrenheit, but this depends on the range, harvest the whole plant. Cut off the plant at ground-level using the knife that is clear.

See related

Caribbean Red Pepper Plants

Caribbean red-pepper plants (Capsicum chinense “Caribbean Red”), an excessively spicy model of the habanero pepper, clocks in at up to 445,000 Scoville units. On the other hand, the cayenne peppers that are best achieve only 70,000 models with this heat- . It is possible to easily develop this kind of plant in even a tiny backyard, but take caution; wear rubber gloves as well as a mask when handling the fruits of the firecracker and use it very sparingly when cooking — just several grams of Caribbean Red will heat-up a complete plate of of salsa.

Identification

As little bushes with upright stems, Caribbean red-pepper crops develop. They function vivid green, ovular leaves with pointed tips and sprout two to to 6 five- flowers per stem, usually. Fruits of the Caribbean red-pepper plant increase about one to two inches long, featuring scarlet skin, wrinkly as well as a lantern – or bell-like form.

Environment

Easy-to-increase Caribbean red-pepper crops prosper as a yearly in all climate zones. These peppers choose full sunlight coverage, about 70 degrees Fahrenheit throughout the day — warm temperatures and 60 degrees at night — and well-drained soil. They tolerate acidic soil, flourishing in the pH range of 6.0 to 6.8, but don’t tolerate frost.

Care

Plant peppers 2-feet apart from another in the spring. The Caribbean Red thrives in moist, but not water-logged, soil. This plant requires properly to poultry manure, fish emulsion, blood meal and manure fertilizers, as well as water soluble vegetable plant-food and 5105 common-use fertilizer.

Growth Routines

This fast growing bush creates fruits that are edible within about 80 to 100 times of planting. Caribbean red-pepper crops bear fruit in bloom and abundance showy flowers in fall and the summer. Fruit could be harvested in the green that was immature stage or completely ripened red phase. With care, the Caribbean red-pepper plant reaches widths of approximately 15-inches and heights of approximately 30-inches.

Potential Issues

Aphids, pepper white flies and weevils assault the Caribbean red-pepper, however these pests are usually eliminated by a powerful hosing. Climbing cutworms and bacterial place may possibly aff-ect Caribbean red-pepper crops — nicely-drained paper and s Oil cylinder collars avoid these afflictions. While an absence of dampness or s Oil calcium prospects to blossom-end rot, foliage might cause sunscald. If the plant is handled by smokers Caribbean Red peppers might drop sufferer.

See related

The best way to Care for Enthusiasm Flowers Using a Red Color

Your backyard ablaze can be set by the passion flower in mid-summer to early fall. The crimson passion flower (Passiflora vitifolia) as well as the red passion flower (Passiflora coccinea) create red blooms on 15 to 20-foot evergreen vines and prosper in Sunset Climate Zones 16, 17 , 23 and 24. These fast growers require minimum treatment once proven, however do need arbor or a strong trellis for help.

Plant passion flower vines in full sun in well-drained soil that’s humus rich having a pH level between 6.0 and 6.75.

Passion-flower or red seedlings 36 to 60-inches apart, allowing space for all these vines to distribute.

Erect a help program because of this climbing vine at planting time. Use fence, a trellis or arbor that offers an area for tendrils to to install.

Water passion flower vines seriously once or twice a week, saturating the soil to the root-level. Although enthusiasm vine is drought-tolerant, water is preferred by it as quickly as the soil feels dry one-inch below the area.

Sprinkle 1/4 to 1/2 cup of well-balanced fertilizer such as foundation the 5-10-10 or 10-10-10, around of the crops in early spring when new growth appears. Work it in the top 2 to 4″ of the soil using a trowel. Repeat at six-week intervals. Alternately, use water soluble fertilizer for flowering plants once every four to to 6 months.

Hand pull weeds to stop them from your passion flower vines of water and essential nutrients. Alternately, use a 2- to 3 inch layer of mulch to suppress weeds and retain moisture.

Dead or diseased vines back to the primary vine in the spring before growth resumes. Trim by by eliminating over-grown vines to preserve dimensions and general form.

See related

The best way to Sprout Trillium Seed

Native to Asia and the United States, trillium grows in woodlands across much of America. Still another eight develop in the section of the United States despite the fact that the Eastern United States promises some 35 species of trillium. Species variety in woodlands and along the Pacific coast line from Oregon south into California or along river banks and flood plains. These flowers that are distinctive create blooms in white and shades of red and pink in springtime.

Remove the seed capsule that is fleshy in the trillium plant as quickly as it matures –roughly 10 to 14 months after blooming. These might be green or shades.

Squeeze the pod to open it and see the seeds. Mature seeds are tan or brown using a white fleshy compound called “elaiosome” connected to the underside. As many as 60 seeds may be held by pods.

Squeeze the seeds — using the elaiosome — into a flower bed that is ready and place them into a depth of 1-inch. Cover the seeds with soil and firm down it together with your hands.

Water to moisten the soil. Water sometimes when the soil dries and prevent disturbing the soil emerge. Trillium doesn’t germinate until the next spring, and generally needs 2 to 3 cycles of cold and warm temperatures.

Fertilize with fertilizer for flowering crops once seedlings attain the blooming phase created. Formulas using a nitrogen ratio, like 51010 are favored, as high-nitrogen development and might is promoted by encourages quick reduce blooming. As a wild flower, trillium usually doesn’t need fertilizer that is supplemental and derives the essential nutritional elements in the humus-rich soil of the forest ground. An application of 1/4 to 1/2 cup of fertilizer sprinkled around the base of the plant and worked into the topsoil at blooming time might be used, if preferred..

See related