Fantastic Design Plant: Eastern Redbud

I admit bias; the Eastern redbud is just one of my all-time-favorite trees. Oklahoma agrees, since the Eastern redbud is its condition tree. This attractiveness, indigenous to the U.S. and Canada, explodes with deep pink color in spring. When I lived in Virginia the blooms were a sign that said, “This is the best weather of the year right now. Enjoy it.” Additionally, because it’s heart-shape leaves, it had been quite easy to spot on plant class quizzes. Obviously, who doesn’t love a heart-shape foliage, plant class quizzes or maybe not? One thing you might not enjoy about such trees would be the 3-inch-long seed pods that they finally fall on the floor, but that’s the amount of attractiveness, and adorable little chickadees count on them for food. Fall is a prime time to plant this shrub.

LLC, Ream Design

Botanical name: Cercis canadensis
Common name: Eastern redbud
USDA zones: 4 to 9 (find your zone)
Water requirement: Prefers moist, well-drained lands but can survive in drier conditions. You ought to water it through warm summer days.
Light demand: Full sun to partial shade
Mature size: 20 to 30 feet tall and up to 35 feet broad
Benefits and tolerances: The shrub is quite tolerant of poor soils, a few drier conditions, urban states and various amounts of shade. It’s susceptible to wilt, fungus, cankers and a few pests.
Seasonal interest: Beautiful deep pink blooms in spring; yellow leaves fall
When to plant: Following the last frost in spring or fourteen days before the first frost in the fall

Liquidscapes

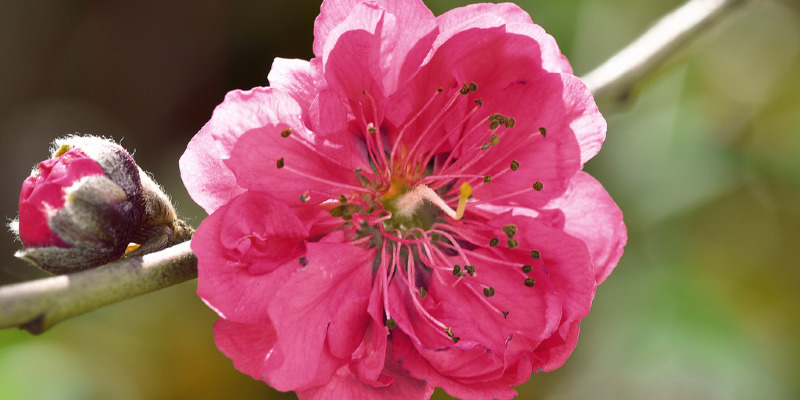
Distinguishing traits. These indigenous trees have been covered in deep pink blooms in the spring; blossoms pop up in clusters along the stems, branches and at times even along the back. Eastern redbuds can flourish in filtered light, so the color they provide is rather a shock to see in a woodland understory.

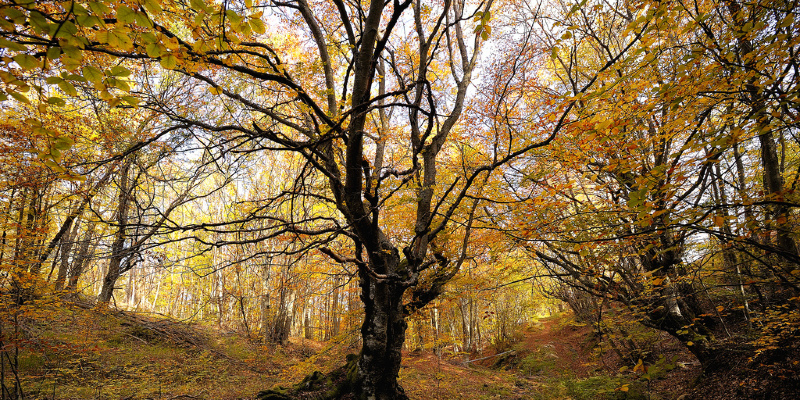
Mature trees have a rounded shape, however when outside in the open, the oldest trees can distribute, getting wider than they are tall.

When they are not in blossom, enjoy their distinctively heart-shape leaves. The leaves are a reddish-purple shortly following the blossom, quickly turn a beautiful shade of green to the summer and after that turn yellow in the fall.

The shrub produces seed pods that finally fall. They are great for wildlife, even as they are a winter food for birds. Birds enjoy nesting in such trees.

Rugo/ Raff Ltd.. Architects

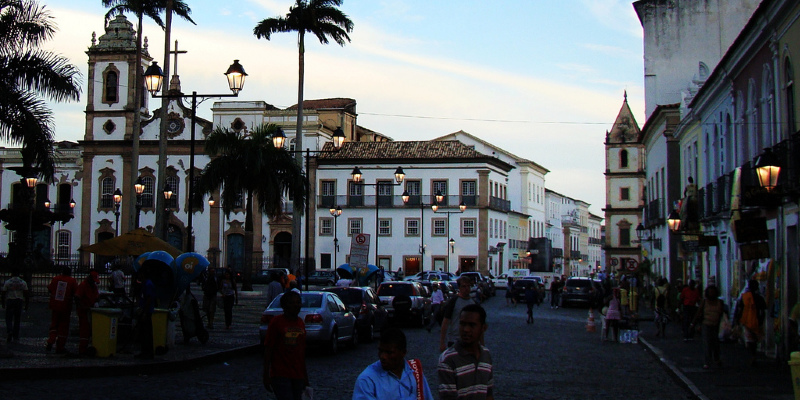
How to utilize it. When I lived in Virginia, I loved going up to Monticello in the spring to see the white flowering dogwoods and pink redbuds prospering in unison. They provided a gorgeous decorative coating underneath the canopy trees (they’ll need filtered sunlight to survive).

Naturally, redbud’s beauty also makes it a fantastic ornamental shrub to utilize solo in your yard or as a tree.

A street tree in Atlanta. As young trees older, you might need to do some pruning for clearance along the sidewalk and also for parked cars.

Field Outdoor Spaces

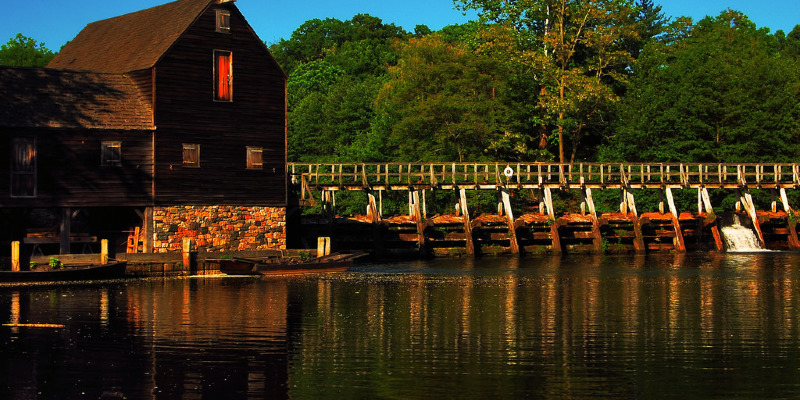
Planting notes. The redbud can develop in a vast array of soils, such as clay, sandy and loamy. But, wealthy loose soil is best.
Dig a hole the same depth as and 3 times the diameter of the root ball. Loosen the roots and place the root ball in the hole.Add soil, packing it down and watering as you move. Ensure you keep the tree watered for the first year.If you reside in a climate with heavy snowfall, you need to use a tree wrap to keep it protected during the first winter.

Liquidscapes

That’s interesting. Founding fathers Thomas Jefferson and George Washington were fans of the Eastern redbud and planted a lot of these on their respective possessions, Monticello and Mount Vernon.

See related

The Way to Work With a Remodeler

Lifestyles evolve over time, and so do our homes. Infants are born; children grow up and leave the nest; aging parents join the household. And even when a home functions just how it needs to, changing design trends and new materials can render older spaces looking somewhat cluttered and dusty.

That’s where a professional remodeler comes from. Read on to find out what a remodeler can do for you and how to get the maximum out of your own experience.

Michael Robert Construction

What a remodeler does: A remodeler is a contractor with a concentration on creating structural alterations to an existing house or building. He or she implements architectural plans and sometimes provides residential design services. Remodelers also perform a number of the same duties as a general contractor, such as hiring and overseeing subcontractors and sourcing materials. Many states have certification requirements for remodelers.

When to hire a single: If you’re planning a significant change or improvement to your house, hire a remodeling contractor to guarantee the integrity of the design and construction, and also to ensure you will meet current building codes. Remodelers are also well versed in cost estimating, legal problems and other nuts and bolts concerns.

What it will cost: Remodelers’ fees take many distinct forms, and costs vary widely depending on the nature of the work and the materials utilized. Although some may agree to a flat fee, others charge a percentage of their total labor and materials costs (typically 10 to 15 percent, but sometimes as large as 25 percent).

It’s worth noting that, as with many facets of home improvement, you get exactly what you pay for — a remodeler who may charge more but has profound expertise and a sterling reputation is usually worth the excess price. Do not hire according to the lowest estimate alone.

Where to locate one: Read the directory of specialists on or listings from the National Association of the Remodeling Industry (NARI). Check to see if there are remodelers’ trade organizations in your area as well. Another professional you’re working with, such as an interior designer, also may have the ability to give you leads.

Should you detect that one of your neighbours is doing work (remodelers frequently place a sign with their name and emblem in the front yard during construction), inquire if they’d recommend the professional they have hired.

Bosworth Hoedemaker

Have a clear idea of what you want. Maybe you’re looking to double the size and change the footprint of an obsolete kitchen, or perhaps you want to convert your attic into a guest suite. Consider the reach of the project you have in mind and generate a ideabook or cull other design resources for inspiration. Do not worry too much about if every detail is achievable; your remodeler will help you brainstorm alternatives if it isn’t.

Interview the candidates in your short listing. Not just should you confirm that they have experience with the kind of project you’ve got in mind, but you’ll also need to be certain that you’ve got a good rapport and communicate well.

Ask detailed questions about job history, professional instruction and affiliations, licensing requirements and insurance, and get the names of a couple references. If lead paint is an issue in your house, you may also should confirm that the remodeler is lead-safe certified under EPA guidelines.

Visit an in-progress job site. Request to fall by a few of the remodeler’s current job sites. This may give you a sneak peek at what your experience may be like. Is the site clean and well preserved, and does function seem to be progressing in an orderly manner? Look closely at the character of the construction and also the attention to detail as well.

Ventana Construction LLC

Be sure you understand the details of the contract. Once you’ve chosen a pro, examine the contract in detail to be certain you won’t encounter any surprises. Besides basics such as contact information for the remodeler and others who are supervising, license number and insurance information, it should incorporate a start-to-finish schedule, a materials list with price breakdowns, payment terms, alter order specifications, patterns or detailed sketches and provisions for conflict resolution. Do not be shy about asking the remodeler to describe any information you find confusing.

Confirm that areas of the house the undertaking will affect. You might be remodeling a single area, however the temporary disturbance could extend to adjoining spaces. Electric wiring and other behind-the-walls systems may be impacted. Ask the remodeler which rooms the work will touch so that you can prepare accordingly.

John Kraemer & Sons

Do your part to produce the remodeler’s job easier. Clear furniture out from affected rooms, be certain the work team has adequate space to park and transport stuff, and also make provisions to maintain pets and children well out of the way. Give the remodeler an idea of your family’s daily schedule and stick to it as closely as possible to minimize disruptions to the workflow.

Make sure you’re easily reachable even when you’re not as onsite. And should you decide to make a shift along the way, try not to haul out the decision-making procedure, which may throw the schedule significantly off schedule.

Do not wait to listen to problems. Few, if any, remodeling projects reach the finish line without a few bumps and snags along the way. Speak up when a problem arises, while it’s substandard work quality, a communication breakdown or a subcontractor who leaves the site in disarray. That way, you and the remodeler can agree on a plan to solve it as soon as possible, before work proceeds too much — and you’ll feel confident that you’ll be completely satisfied when it is time to make the final payment for the occupation.

More: Find a remodeler near you

See related

Modern Meets Eclectic For Delicious Dining Rooms

I really like midcentury modern layout, but I strongly believe that it needs to be tempered with furniture from other eras and individual things to avoid looking like a set from Mad Men.

In fact, I think that all rooms should include personal products. Design is all about reflecting your personality and way of life. It needs to be beautiful and comfy above all other things.

All these 10 dining rooms contrast starkly with conventional, cushy dining areas which have matching upholstered chairs and clear color schemes. They’re a little wild (in an understated manner), a little mix and match, and totally relaxed and comfortable. Every one of these is made for lingering over meals and good conversation. Please pass the wine.

Fotograf Lisbet Spörndly

Elements of midcentury design (hello, lantern wallpaper) mix with the farmhouse sideboard, a contemporary light fixture and a lot of mismatched chairs. It should not go together, but it will — and superbly.

Holly Marder

This dining table, made from reclaimed timber, is the ideal complement to a menagerie of colorful chairs. It’s simple and contemporary, but additionally, it has a warm, inviting farmhouse cosmetic.

Croma Design Inc

Easy, clean and very contemporary, this distance is warmed up with its proximity to the living room. Nothing is more casual and friendly than a open floor plan. Also, check out that sculpture, which bring the ceiling down to a more intimate level.

Room & Board

Here’s another contemporary take on the farmhouse feel. The lines are clean and Danish, but the atmosphere is “everybody’s invited for cherry pie.”

Room & Board

The carpet adds so much heat to a beautiful (oh, that natural border table) but stark dining room. A little cozy goes a very long way with midcentury layout. And timber consistently helps with heat.

Dreamy Whites

Louis IVX matches Malibu. That is pretty traditional French nation, but with no frills. The walls and floor give this installment a more contemporary vibe.

This is diverse modern at its best. It features midcentury modern icons such as the Ghost Seat paired with conventional furniture, an eclectic display of art and dollops of color against white. Beautiful.

Emily McCall

A traditional farmhouse dining table and built-in china cupboard are paired with white Panton chairs plus a bare, contemporary appearance. It’s the best of both worlds: stylish and welcoming, casual and slick.

The nuclear age matches soft arches, dark walls and a classic pedestal dining table. It’s very modern without looking overly theme-y.

Watch the rest of the creative house in Omaha

Dufner Heighes Inc

The chinoiserie wallpaper is in stark contrast with the simple (almost Shaker) lines of this furniture. With no this room would appear unfinished.

More:

The Easiest Room to Decorate: The Dining Room

11 Vibrant and Colorful Dining Rooms

Design Chat: Eclectic vs. Collected

See related

Fantastic Design Plant: Iranian Wood Sage

Summer is here and the heat is on, with all the sweet scents of the garden permeating the air. Iranian wood sage (Teucrium hircanicum) is among the summer bloomers infusing landscapes using its deliciousness — both visually and aromatically. Iranian wood blossom is a sunlight- and heat-loving perennial that’s easy on water usage and easy on the eyes, and will keep you seeing magenta from June until September.

J Biochemist

Botanical name: Teucrium hircanicum (syn. Teucrium hyrcanicum)
Common names: Iranian wood blossom, Caucasian Germander
USDA zones: 6 to 10 (find your zone)
Water requirement: Moderate
Light requirement: Total sun
Mature dimensions: 18 to 24 inches tall; 12 to 18 inches broad
Benefits and tolerances: Flowers attract butterflies and bees; heat and drought tolerant
Seasonal attention: Summer blossoms
When to plant: Plant seedlings in spring or fall; self-sows profusely

J Biochemist

Here we view Iranian wood sage in a raised planter layout by Piet Oudolf, alongside Sea Holly (Eryngium spp) — both favorites of the superbly manicured bouquet or garden.

Distinguishing attributes. Different magenta spikes arise in late spring and continue to bloom through summer and into fall. Projecting above mounding leaves, they are the initial features of the plant to capture the eye. But let’s not neglect the foliage. Fuzzy, green sage-like leaves emit a rich fragrance that’s enhanced by heat and sunlight exposure. The evergreen leaves are brilliant yet work as a acceptable backdrop to the floral scene which simplifies the plant.

The best way to utilize it. When planted en masse these plants create a billowy sea of pink and green. Architectural yet soft, they blow nicely in the wind and create the best “undesigned” garden impact. Iranian wood sage grows well in containers and provides profile diversity for a lively layout. Line a path or fill out a stone garden.

J Biochemist

Planting notes. Plant Australian timber blossom in full sunlight — partial afternoon shade will be a advantage in extremely hot climates. While it can grow in soil conditions which vary from rugged to ordinary or even marginally moist, make sure the soil is fast draining. This plant endures if overwatered.

Enrich the soil with organic material before planting. This plant does not require an excessive amount of maintenance or oversight once it is established. You can expect to find blossoms even the first year.

More: Great layout blossoms and plants, trees and grasses.

See related

Lift a Room's Appearance Having a DIY Pendant Light

A number of lighting choices in a room can take it from dull to lively . We have numerous lighting fittings in our home — numerous so-called “boob lights,” that is. I believe the standard of the builder lighting the Achilles heel in room layout. We have at least one in each room of our home. Our kitchen boasted three — one in the middle of the room, just over the sink and one in the nook. We knew we had to replace them.

Meg Padgett

The location over our kitchen sink was our first stop in the overhaul while I would love to complete a marathon elimination of all the lights. The existing light’s proportions were all wrong, and two miniature pendant lights could be just the right touch of beauty and tranquility. While this was not the room’s finishing touch, it sure did help place the end in sight.

Meg Padgett

We made our pendant lighting.

Materials used:

Westinghouse Oil-Rubbed Bronze Mini Pendant Lighting Kit
Westinghouse Safe-T Pan
Glass shade
Utility knife
Drill

Meg Padgett

After turning off the power, we removed the existing light over the sink.

Note: Constantly consult with the local building codes when planning any home improvement project.

We referenced Black & Decker’s The Complete Guide to Wiring, which offers detailed step-by-step instructions for many electric jobs and is fully compliant with the most recent National Electrical Code.

Meg Padgett

We measured and marked the middle of where our pendant lights could be installed. We chose to center them over each side of our double sink.

Meg Padgett

We assembled the pendant lighting kit according to the manufacturer’s instructions and attached the glass shade. There are numerous types of colors available at big-box stores, but we purchased ours from a local thrift store for less than $1.

The pan kit comprises its own hardware and instructions for mounting.

Meg Padgett

We traced around the perimeter and focused each pan on our marks.

Meg Padgett

We cut out the circular pieces using a utility knife.

Meg Padgett

We first predrilled a hole in the middle of all which was utilized to feed through the electric wiring to mount the Safe-T Pans. Then, referring to the manufacturer’s instructions we mounted the pans to the ceiling.

Meg Padgett

If you are not comfortable doing your own wiring, call in an electrician. Otherwise, measure the duration for each light and cut any extra wiring off, leaving a few inches extra for leeway.

Together with the power still turned off, we fed the electric wiring through the predrilled hole and connected it to the pendant light’s wiring. (Refer to an up-to-date wiring manual along with the pendant kit for certain instructions on working with electrical wiring, and for troubleshooting assistance.)

Then we turned the power back on and checked that the wiring has been connected correctly.

Meg Padgett

Finally, we patched the hole left from the original lighting and primed and painted the ceiling.

Meg Padgett

With these beautiful pendant lights and illuminating my favorite workspace — we’ve got just one more step to complete our kitchen remodel: installing crown molding and door trim.

See related

Interior Trim: 8 Must-Know Elements

Welcome to the fantastic world of interior trim. From baseboards to casings, from crown moldings to railings, trim is a style element that adds depth, detail and richness to a room. But it has become so common, so omnipresent, that lots of people don’t give it much consideration. We go to the local lumber store or big-box home centre and buy a few feet of”colonial” or”ranch” moldings and then call it a day. That is a shame, as there are so many profiles, sizes, fabrics and much more.

So let us look at some molding and trim elements and see how they are positioned on a wall and also the way they could enliven a room.

dSPACE Studio Ltd, AIA

1. Base. Employed where the walls and flooring come together, the base, or baseboard, conceals any gaps between wall and floor finishes in addition to provides protection to the wall end from shifting feet, jostled furniture, etc.. Traditionally it had been composed of three distinct components: a shoe (the little, curved or beveled bit that transforms from baseboard to floor), the baseboard (the tall, flat piece) and the cap (an ornamental piece that sits atop the baseboard). But foundations are now more frequently than not manufactured from a single bit to get a cleaner and more modern aesthetic.

Incidentally, when I was considerably younger, I moved to architectural school in London and worked for a British construction firm. In addition to learning a new language (we all know a”elevator” is an”elevator” and the first floor is the second floor), I heard that the British term for a baseboard is”skirting.” I like that term, especially as a base and a skirt have.

Hanson Fine Building

2. Chair rail. Moving up the wall from the floor, the next bit of trim after the base is the seat rail. Functionally, this trim item protects the walls finish from any furniture that gets put against the wall. Though most commonly installed around 36 inches from the floor, a chair rail could be set up just about at any given height. The key issue is the way the seat railing divides the wall into horizontal layers and getting those proportions right.

Shirley Meisels

3. Wainscot. While the space between the seat rail and baseboard could be finished as the rest of the wall (painted or wallpapered), many times the place is paneled. The options for the wainscot are numerous, such as easy wood panels, beadboard, raised panels and flat wood paneling. And though the end of the wainscoting may match the wood trim, it does not need to. By way of instance, a painted wood baseboard and wainscot of easy, recessed panels functions well with the stained wood window and door trim.

Clay Squared to Infinity

4. Window casing. The conventional way of casing a window (or door) would be to use different side, top and bottom bits. Since each piece is distinct, the trim can be detailed and articulated. For instance, along the top of the windows there may be a horizontal ring that offers a base for a large, flat ring that retains a shaped crown. This really is a semicustom approach, as each bit may be purchased, or milled, and set up separately, getting you the specific profile and appearance you will want.

The Kitchen Studio of Glen Ellyn

Using a pleasant, deep sill to put objects on is an edge to casing a window using distinct pieces. And the flat bit below the stool (shelf), called the apron, may be shaped and sized as you like. The feces can be shallow or deep, depending on what you want to put there and you are overall design.

Veranda Estate Homes & Interiors

5. Door casing. Like window casing, door casing is traditionally set up as separate bits. But unlike any window casing, door casing, for obvious reasons, does not have any bottom stool or apron.

Although not entirely a specified, the door casing stems from the exact same family of trim profiles as the window casing. So where there’s a Craftsman-style window trim, you’d expect to observe a Craftsman-style door trim. Sometimes, especially in a design that is complex, changing scale while retaining the profiles exactly the exact same is a way of identifying door and window trim. By way of instance, a big and tall doorway may deserve a bigger and more robust trim than, say, a little specialty window.

Ben Herzog

You could realize you want to treat the sides and top of a cased opening exactly the same. That means you are going to take the identical profile that is used on the sides, or jambs, and run that around the opening. In this instance, a cased opening is created by using the exact same trim on the sides and on the cover of the door. In a window program, a”photo frame” effect is created by using the exact same profile around (top, bottom and sides).

MANDARINA STUDIO interior design

6. Picture rail. Continuing our journey up, closer to the top of the wall you’ll come across the picture rail. This trim piece originally served as a support to hang images on, as plaster walls were not the best and may be easily ruined by all those image hooks wrapped into the wall. Of course, with the arrival of inexpensive pictures hooks that is readily nailed into a wall to support pretty much any size image, the image rail has lost its utilitarian function. Now this bit of trim can be used mostly as a decorative element to split the wall into horizontal layers.

Bosworth Hoedemaker

7. Plate rail. Though not always near the top of a wall, the plate rail serves as a platform to exhibit an assortment of objects. The depth of the plate rail may vary from quite shallow, in many instances where a plate has been displayed, to very heavy when large objects must be displayed. A plate rail’s place on the wall (higher up for heavier railings ) will also determine its depth. By way of instance, bigger objects requiring a heftier rail will demand placing the plate rail higher on the wall therefore that it’s out of their way, even though a thin rail for displaying plates may also serve as a seat rail.

Bud Dietrich, AIA

Though plate rails and image rails have lost their working function, a cut line at the top of the window and below the ceiling is a powerful design tool. In addition to making a room more interesting and rich, this trim line may be used to set up that a”datum” from that other elements such as soffits could be organized out of, an approach used by architect Sarah Susanka and many different architects quite effectively.

dSPACE Studio Ltd, AIA

8. Crown molding. At the very top of the wall, where ceiling and wall come together, is the crown molding. Just like other trim items, the option of size and profile are almost unlimited.

What’s especially nice about crown molding is its ability to soften the transition between ceiling and wall, between vertical and horizontal plans. So instead of have that sudden sharp corner, crown molding allows the eye simplicity into moving from one to another. It’s a kinder, gentler and more elegant solution to your shift.

See related

Roll Out the Red Carpet for a Garden That Is a Smash Hit

I went through a red stage when I started decorating my own apartments in my 20s. After about five years that I dropped out of love with all the sexy hue and moved into a love affair with green and occasionally the slightest hint of blue. Perhaps that makes sense; that is when my romance with gardens began.

In any case, although I still adore my greens and grays, my love for red is slowly coming back. Forget shy pinks and subtle creams in the backyard. Give me power! Give impact to me! Give me red. Red can cheer up a bed that is tufted, draw attention to undervalued areas of the backyard and deliver a punch of colour to any potted arrangement. Let’s observe this hue and bring on the red.

Debora carl landscape design

Red flowers waving in the wind say, “Hello!” To visitors in a strong, welcoming voice.

Windsor Firms

Red draws the eye instantly, hence the brightly colored stop signals. To attract attention to a front entrance, plant a swipe of reddish annuals like these impatiens at a refined arrow pointing directly toward your primary entrance.

Debora carl landscape design

Red can proceed subtler when paired with deep blues and maroons. With the large contrast of green and red, this grouping of red kangaroo paw and blossoms says, “Hello!” With a beautiful South African accent.

Ami Saunders, MLA

If you understand red in the backyard, then you’ve probably met a Japanese maple. With cut leaves so intricate, they almost look like blood-tinged lace, Japanese maple makes a statement loud and clear. Pair your maple with understated evergreens, greens and rocks for the best show.

The best way to grow Japanese maples

Huettl Landscape Architecture

Are you sick of the same old cottage garden appearance? A touch of red is similar to a swath of lipstick, bringing a grin to the backyard.

AMS Landscape Design Studios, Inc..

Do not be afraid to mix magenta and red. These often clashing tones look great when they’re combined intentionally. Leave no doubt that you intended to wed both hues for a fiery statement.

1800Lighting

Coordinate your blooming reds with tough features in your house and backyard. Match the hue of your red entrance door, draw attention to a own red barn or plant a sea of red poppies to highlight red trim.

Christopher Kellie Design Inc..

For a pop of red without a lot of work, select reddish blossoms, like those geraniums, for container gardens flanking the front entrance. Insert some at a higher level as a bonus.

JOHN DANCEY Custom Designing/Remodeling/Building

Whether your red is climbing or potted, wispy or strong, it says loud and clear, “This is my house of which I am proud. Please come visit!”

Inform us : Can you use red in the backyard?

See related

Rosette Blocks Show It's Hip to Be Square

Being married to a carpenter, I have the joy of being immersed in a world of architectural trim. My most recent learning experience came in the form of the rosette block.

Wooden rosette blocks are both practical and stylish. They form a decorative corner window and door casings; functionally they remove the need to calculate complicated miters, typically otherwise required where moldings meet in corners.

Wood rosettes have been showcased on window and door casings because the 1800s and were especially popular in Victorian houses. These days they be may used with many trim styles to create a traditional or transitional feel.

Rebekah Zaveloff | KitchenLab

This historic Highland Park, Illinois, residence features original stained trimwork with rosette blocks.

Union Studio, Architecture & Community Design

Rosette blocks helped Union Studio preserve the architectural integrity of the Jamestown, Rhode Island, residence during its renovation and addition.

The Red Jet

Wood rosettes add ornamental detail to the original wood moldings in this Boston apartment.

Lasley Brahaney Architecture + Construction

Designed by architect David Adler, this historic Princeton, New Jersey, residence features a bevy of architectural details, such as bull’s-eye rosettes.

Flea Market Sunday

Together with rosette blocks, bull’s-eye plinth blocks are utilized at the edge where the baseboard joins the casing of the doors in this Encinitas, California, waterfront home.

Gast Architects

Rosette blocks are quite common in Victorian houses, like this 1898 San Francisco row house.

Union Studio, Architecture & Community Design

This historic New England home is loaded with architectural details, like a coffered ceiling, an integrated buffet and trim with rosette blocks.

Moore Architects, PC

Crown molding and rosette blocks grace the interior of the 1889 Gothic Victorian residence in Arlington, Virginia.

midwestmouldings.com

BR215-T Rosette

Rosette blocks made from solid wood are readily available in many sizes.

More: 11 Must-Know Interior Trim Elements

See related

An Architect's Calling Cards

Hello. I’m an architect.

I often feel misunderstood. I’m usually cast as the aloof, artistic type, standing at the corner of the room, staring out the window at some distance church steeples. I appear to know complicated and important items. I appear cool and collected on the outside, wearing my perfectly tailored black turtleneck sweater at the middle of July. But on the inside? Well, not so much cool and collected. I can be hard to approach. I can be difficult to talk to. And if you do spend time together with me, I can be impossible to understand. I can be esoteric. I can be obtuse. I’m impatient. I have a problem.

So I’ve started giving calling cards out to people at parties, to break the ice. This way, people will know how to talk to me. These cards would be the equivalent to an architect ID tag. If I’ve drifted off to my ideas and I’m unable (or unwilling) to talk for myself, I can just show you my calling card, and then you’ll know I’m severely allergic to small talk.

And we can just skip it and chat about Prague.

Jody Brown Architecture, pllc

Thank gawd for Ikea.

Pllc, Jody Brown Architecture

Unless it is sexy. Then I wear black.

Jody Brown Architecture, pllc

[Jody shuffles feet uncomfortably.]

Jody Brown Architecture, pllc

OK, this one’s not fair, really. Architecture is one of the few professions that I can think of where you are likely to have a broad knowledge of multiple fields. Architecture is part art, science, engineering, sociology, economics, politics, ecology, engineering, psychology and so on. We can not know everything. We all know just a bit about what, by coaching. This is most likely why I’m anxious talking to you. You believe I know what I’m talking about. However, I do not.

Jody Brown Architecture, pllc

Please , never let an architect pick your dining room seats. They’ll be beautiful but uncomfortable and costly.

Jody Brown Architecture, pllc

Jody Brown Architecture, pllc

Mainly because less requires more time.

Jody Brown Architecture, pllc

I almost couldn’t create this picture. It hurts my head.

Photographs used to make these graphics are used with permission under creative commons license. Click graphics for links and photo sources.

More by Coffee Using an Architect:
12-Step App for Architecture
A Primer on the Language of Design
Find Your Inner Minimalist
Flash Cards for Architectural Conditions
Find Your Architectural Style
Great Architecture Speaks to Us

See related

Curtains See the Light

I enjoy bright, airy interiors, and my inspiration chambers usually consist of breezy white curtains or no window treatments in any way. Yet there’s something to be said about dark curtains. They could give a feeling of drama, elegance and contrast to a space when utilized appropriately. However there are a few important points to bear in mind when considering moody panels.

First, dark-colored curtains work well against light walls. Dark walls and dark curtains equals a picture theater impact, which may feel oppressive. Dark curtains work nicely with warm white, cream, gray, light tan and even blue walls that are blue.

Another design suggestion is to use black drapes in large rooms or rooms with very high ceilings to visually shrink the room and give it a cozier vibe. Just repeat the color of the curtains somewhere else in the room for cohesion. It’s one thing for the curtains to look dramatic and yet another to look misplaced.

Finally, if you can not commit to a solid dark panel, try a printed cloth that comes across as largely dark but contains lighter colors too. For example, a black and white ivory floral could get the job done nicely. Dark, printed curtains lend drama in addition to attention to a room.

When used correctly, dark curtains can be a striking picture element in a well-appointed space. So don’t rule out them just because you prefer airy interiors. I am taking my own advice with this one and intend to hang charcoal sheet panels at the family room of this home we’re renovating. Obviously, I’ll couple them with light walls.

Alexis Lane-Sanders Portfolio

Charcoal panels are an exaggeration of this lighter grays on the chairs and rug in this workplace. The moody curtains are dramatic against white walls, while the natural wood desks comparison the curtains. The effect is one of sophistication.

ROMABIO / Interior & Exterior Mineral Based Paints

In this living room, long and slim floor-to-ceiling panels comfy up a rather large space. The taupe color picks upon the color of one of the sofas.

RLH Studio

One way to liven up a darker panel would be to select one with a print — rather one that incorporates a lighter shade. In a glimpse, the panel contrasts against white walls, however upon closer inspection the print attracts pattern and interest to the space.

Jenn Hannotte / Hannotte Interiors

Black curtains are not just for impartial spaces. This colorful kid’s room wears them well. Paired with white walls, a painted turquoise fireplace, red accents and a playfully patterned carpet, black curtains lend a picture element. Additionally, it is worth mentioning they help to block out early morning sunshine, encouraging wee ones to sleep in past sunrise. Hallelujah!

Rebekah Zaveloff | KitchenLab

Within this spacious living room, the dark curtains pick up on the glossy black pendants suspended over the dining table. Repeating the use of black from room to room promotes cohesion.

Echelon Custom Homes

Deep navy curtains in this bedroom mimic the stripes found in the area rug. A lighter blue on the walls keeps things cozy yet still provides a contrasting background for the curtain panels.

COOK ARCHITECTURAL Design Studio

I once read that having darker colored curtains to frame windows may distract your eye from an undesirable outdoor view. See how in this room, the eye travels around the space, instead of outside it. The gold panels mix nicely with the other warm tones in the interior design. Notice the pumpkin color at the bottom third of these panels too. It helps to bring the panels along with the elevation of the ceiling down for a cozier feeling.

Economy Interiors

Here is another good example of working with a dark printed fabric for cushions. Having at least one more black part, the black couch table, is the key to creating these curtains work nicely in this particular room.

Amoroso Design

Plum panels match the tufted velvet on the chaise and provide this very simple space a luxurious look. To keep things from appearing hefty and drab, the velvet is paired with light walls and glistening accents: metal floor lamp, leaning mirror, Lucite table.

Atmosphere Interior Design Inc..

These moody floor-to-ceiling drape panels visually bring down the high ceilings and accentuate other black finishes including fireplace, accent chairs, zebra rug, lampshades — for a comfy feel.

More:
The situation for Beautiful Black Cabinets

See related