Growth Stages of Ragweed

Native to the midwestern and eastern U.S., several species of annual ragweed (Ambrosia spp.) Have found their way west of the Rockies, including varieties that have developed resistance to common herbicides. Common ragweed (Ambrosia artemisiifolia) and associated species, banes of allergy sufferers, have different developmental stages. Many ragweed species germinate over prolonged, extended intervals, which makes them difficult control because neighboring plants can be at different phases of growth. The two primary phases of ragweed development, vegetative and reproductive, can be split further.

Seedlings

Ragweed seeds germinate anywhere as soon as the soil warms and moisture is present. In warm climates, that can be as early as February or March. The seedlings first appear as a set of oval, spoon-shaped cotelydons around 1/2 inch long. Clusters of seedlings often cover the soil surface in which seeds fell. Based on the species, one ragweed plant can produce 3,000 to 5,000 or more seeds. Ragweed seeds that were covered with disturbed dirt can continue to germinate throughout the growing season if moisture temperatures and conditions are appropriate. Annual ragweed plants have a long taproot and many fibrous roots, which makes them efficient at taking in water , even in sandy dirt.

First True Leaves

The ragweed’s first true leaves grow about five to seven days after germination when the seedlings are about 2-3 inches tall. These leaves are oval-shaped, simple leaves around 1 inch wide, arranged opposite each other on the stem. A second set of oval leaves rises above the first, also opposite each other on the stem but tilted in the initial pair.

Lobed Leaves

Following the second set of oval accurate leaves, the very first set of lobed leaves seems. Ragweed leaves are almost always simple, and typically in pairs arranged on opposite sides of the stem. Average lobed leaves have stiff, short hairs covering their surface. Ragweed plants tend to develop over neighboring plants, competing for light. Giant ragweed plants (Ambrosia trifida) growing as annuals in the exact same seed head may reach only 3 or 4 feet tall when competing with low-growing plants, but they can bend over taller plants at 7 to 8 ft in their hunt for sunlight.

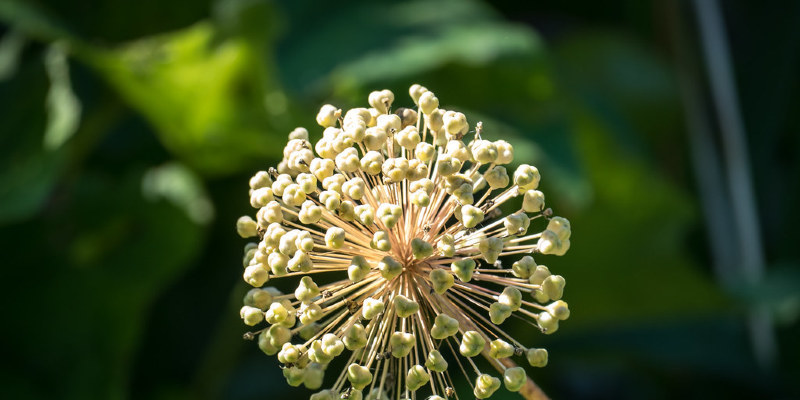
Ragweed Reproduction

Ragweed plants are monoecious, meaning one plant has both male and female flowers. They could be in bloom for several months, from ancient adulthood until the end of the growing season. The male flowers are about the graceful spikes, known as racemes, that develop at the peak of the plant. The female flowers form in clusters on small stems just under the racemes. The male flowers on one plant can release as many as 10 million pollen grains. This enormous amount of pollen ensures greater genetic diversity — one reason for the fast spread of herbicide resistance through cross-pollination. Following the flowers are pollinated, ragweed seeds grow inside a pithy, protective husk. The seeds are distributed by hanging to sneakers, clothing, animals, and farm or gardening equipment.

Perennial Ragweed

Western ragweed (Ambrosia psilostachya), also a native perennial, rises in U.S. Department of Agriculture plant hardiness zones 6 through 10 and produces seeds and also spreads by rhizomes. It tolerates dry, sandy dirt and hot states, sometimes shedding its leaves during periods of stress, then recovering when conditions improve to rebloom and produce more seeds. Desert ragweed (Ambrosia dumosa) is another perennial species that grows in USDA zones 7 through 11. It is a little shrub about 2 feet tall.

See related

Are Pin Oak Acorns Edible?

Oak trees (Quercus spp.) That fall, reproduce by means of acorns or are harvested in large numbers by birds and squirrels. All acorns are edible, however they must undergo leaching to remove the tannin which makes them bitter. Acorns made by members of the white oak tree group are believed less bitter and sweeter-tasting than those of the red oak group, where the pin oak (Quercus palustris) is a member.

Pin Oak Facts

Hardy in U.S. Department of Agriculture plant hardiness zones 4 through 8, pin oak is native to the northeastern United States and southeastern Canada. Tolerant of moist soil, is grows to maximum 70 feet tall with a 60-foot-wide canopy. Its acorns have saucer-shaped, shallow caps and step 1/2 inch. Acorns of northern pin oak (Quercus ellipsoidalis) are somewhat longer, and each one’s cap covers almost half of this nut. Northern pin oak achieves exactly the same maximum height and spread as walnut and is hardy in USDA zones 4 through 7.

Leaching Truth

Their bitter flavor is removed by leaching acorns in water. One method requires putting the nuts, running them through the fine plate of an espresso grinder to form nut meal, soaking the nut meal in boiling water for one hour so that the water turns brown, and reboiling the nut meal into fresh water as often as necessary until the water remains clear. After the nut meal dries in a location that is warm and is ground another time, it is ready to use for baking and cooking.

See related

The Best Time to Destroy Rag Weeds from Moon Phase

A prolific pollen producer, ragweed (Ambrosia spp.) , blooms from midsummer to early autumn, spreading its allergens around. Growing to the Pacific by the Atlantic coast in a variety of habitats, such as areas, failed and cultivated landscapes and roadsidesreaches up to five feet tall, producing spikes of small flowers that drop pollen. Following centuries of training, the very best time to ruin this weed is when the moon is waning, from full moon through the last quarter, in accordance with the”Old Farmer’s Almanac” online.

Moon Phases

As the moon orbits the earth and the earth orbits the sun, the moon changes position in the sky in relation. The moon with regard to the sun’s place determines how much of the moon reflects sunlight. During the new moon, the side of the moon faces the ground. From the skies following the new moon, a small sliver of illuminated moon looks as the moon changes positions. Each night the amount of illumination increases, known as a moon, before the side of the moon facing the earth is fully illuminated, known as the full moon.

Waning Moon

After one night of full moon, the moon begins to wane. Each night, the illuminated side of the moon facing the ground decreases bit by bit, before the illuminated side of the moon is not in any way visible, known as new moon. The moon stages during the period are known as the dark of the moon. According to folklore, the dark of the moon is regarded as a period, as gravitational pull is decreased and moisture is not as abundant in plants or soil. When ragweeds lack vulnerability, cultivation or other control methods are more successful. The fourth quarter of the moon periods — the last quarter of the waning moon — is the most dormant period and the most optimum time for destroying weeds, writes Marion Owen, garden author, in her post”Planting by the Moon,” printed on Plantea.

Where and How Ragweed Grows

Many ragweed species grow as annuals all across the USA, with common ragweed (Ambrosia artemisiifolia) more prolific in the southeast than in other areas of the U.S. Common ragweed spreads by seeds, and to a lesser extent by rootstocks, as severed roots may send up new shoots. But, western ragweed (Ambrosia psilostachya) is a native perennial that grows throughout all U.S. Department of Agriculture plant hardiness zones. Western ragweed can spread so eradication of the ragweed species necessitates killing avoidance of seeding, in addition to the roots.

How to Destroy Ragweed

Tillage, or hoeing, is among the greatest approaches to ruin ragweed, which contain a brief taproot plus shallow fibrous roots. Ragweed is less inclined to re-establish itself by simply taking root . Mowing to maintain ragweeds low also interrupts the cycle that is developing and causes the weeds to eliminate .

Lunar Gardening

Scientific evidence for the benefits of gardening by moon phases, known as lunar gardening, is scant, says Sabrina Stierwalt at”Does Lunar Gardening Really Work?” Published about the Curious About Astronomy website. Nevertheless, lunar gardening was practiced for centuries by proponents.

See related

What Plants Can I Grow That Keep Mosquitoes and Bugs Off?

Some crops possess insect confusing or repelling properties. Others others attract insects, which every difficulty bugs. Others will be able to help you minimize habitat. You are given an alternative to insecticides and chemical repellents by A vast array of plants.

Plants that Repel Insects

Some plants repel insects in much the same way as DEET (N,N-diethyl-m-toluamide), a commercial insect repellent . So they have a tendency to avoid these crops have a odor that mosquitoes don’t enjoy. Catnip (Nepeta cataria, U.S. Department of Agriculture plant hardiness zones 3 through 9) comprises nepetalactone, an insect repellent that functions to keep mosquitoes off. From the Aug. 28, 2001, issue of ScienceDaily, researchers from Iowa State University reported that nepetalactone functioned better than DEET as a mosquito repellent. Anecdotal evidence suggests that basil (Ocimum basilicum L., annual in USDA zone 3 through 9, perennial in zones 10 a higher), citronella (Citronella spp., USDA zones 9 through 11) and lemongrass (Cymbopogon spp., USDA zones 9 through 10) might have similar properties. Crush the crops and rub them on exposed skin where you’ll be sitting or strew the plants around the region.

Plants that Confuse Insects

Other crops discharge a smell that confuses insects, so that they can’t find their meal. Onions (Allium spp.) , for instance, can keep bugs away from garden plants. Onions grow in USDA zone 1 through 9, but you reside in zones 8 and 9 you should search for”short-day” varieties. When implanted near anything at the cabbage (brassica spp., USDA zones 1 through 13) family, they keep away chewing insects, especially maggots. Scents are also released by kitchen herbs. Even if you don’t cook together, aromatic herbs might help keep bugs away from the garden.

Plants that Attract Beneficial Insects

By bringing their enemies, plants can keep down insect populations. For instance parasitic wasps, lady beetles and soldier beetles eat aphids, which can decimate your garden. Umbelliferous plants such as fennel (Foeniculum vulgare, USDA zones 5 through 10) and dill (Anethum graveolens, USDA zones 3 through 11) attract these natural predators, which then lay eggs that hatch into larvae, which eat the aphids. When bringing insects, remember two things: These insects eat nectar and pollen , therefore provide plants with showy blossoms and scents that are noticeable. They also often have small mouths, so tiny flowers like those from the umbelliferae and aster households are more attractive to them that blossoms.

Plants that Reduce Habitat for Insects

An additional way to keep mosquitoes away is to minimize their habitat. If you have a pond in your yard, you get a mosquito breeding ground. In addition you can keep mosquitoes off using plants to cover the surface of the water, to maintaining the water moving or adding fish to the pond. If mosquitoes can’t get to the water’s surface , they can’t breed there. Waterlilies (Nymphaea cvs., USDA zones 3 through 11) work well to keep away mosquito larvae.

See related

Propane Home Heating and Building Codes

Although fire and building codes vary from location to place, every locality is going to have some codes that govern the installation of underfloor heating piping, appliances and storage tanks. Installation of propane heating systems will require licenses from local authorities and compliance many facets of the installation, all of the way from the appliance to the outdoor tank, will be subject to such demands.

Tank Location

Local building codes will determine where you can set your septic tank, and they will explain to you the tank can be to other constructions as well as to these things as railroad tracks, playgrounds and other substances. Generally, propane tanks must be at least 10 feet away from structures; the minimum might be greater depending on the size of their tank. Codes will specify the location of the point where a link to fulfill the tank is made by your propane provider, or the purpose of transfer. In addition, there might be clearance requirements to the relief valve of the tank.

Piping Prerequisites

The yard — the exterior piping which connects the tank to the furnace or heater within the home of the septic tank — must be buried, and the installation of the piping will need a permit. So that, in the event of future excavation, contractors can ascertain where it’s unsafe to dig the purpose of the permit is to make the location of the piping a matter of document. There will be a minimum thickness requirement for lines; the required thickness is usually between 12 and 18 inches.

Heater and Furnace Prerequisites

The installation of gas-burning furnaces, such as those that burn propane, are subject to a range of code demands which cover numerous qualities of the installation, such as clearances, combustion air distribution, duct work, venting of the furnace, electrical service to the furnace, and security devices. The International Building Code, where many local construction codes are based, includes all of these requirements in Chapter 24 of its Section IV; local guidelines may vary in the IBC, however, so you ought to always check with the local building authority to learn the applicable requirements where you reside. A permit is required by Setup of a propane furnace . Portable propane heaters are prohibited from use in houses by the California Health and Safety Code.

Code Compliance and Permits

Since the code requirements vary locally and regulating the installation of storage methods and propane appliances are complicated, the installation of the system should always be carried out. Typically, the builder will have the ability to acquire the licenses for you and assure that installation is compliant with all applicable fire and building codes. The Western Propane Education & Research Council instituted the California Safe Appliance Installation Incentive Program in 2014, to encourage compliant installation of propane appliances; a monetary incentive is provided by the application to homeowners whose propane appliances pass a safety review.

See related

The Way to Choose Stove Pipe Thicknesses

Stove pipe known as smoke pipe or connecting pipe, extends to wall or the ceiling. Stove pipe is utilized within the home particularly for venting wood-burning stoves. Whether you’re installing a cooker on pipe or starting from scratch consult with follow code requirements.

Standard Single

Stove pipe is used on wood stove installations. It ought to be at least 24-gauge sheet thicker or metal — that the lower the gauge, the thicker the metal. Normal code demands that stove pipe keep an 18-inch clearance from any combustible material. Single-wall pipe ought to be used for ventilation to the point where the pipe enters ceiling or the ceiling. Never use pipe on the outside or to penetrate through ceilings or walls.

Class Act

Use Class A double-wall stove pipe on modern stoves with evaluations that are close-clearance. Optionally, use it with standard wood stoves when the stove pipe has less than the mandatory 18-inch clearance from combustibles. Class A allows for a 6-inch clearance from combustible materials due to an insulating pipe or sleeve on the interior. Both outer and inner pipe thickness should be at least 24-gauge.

Collar This

Measure the collar socket for diameter. The collar is the welded circle on top of the cooker where the pipe connects. Most residential wood stoves are equipped with a 6- or 8-inch collar. The collar dimensions should be matched by the width of the stove pipe. Changes in diameter between the pipe and the collar can commence draft difficulties, causing the cooker to emit overall reduced functionality and smoke when the door is opened. Consult local building codes, when modifications are made to length or diameter — such as much the chimney pipe goes above the roof line.

The Path to Take

Do a review of the path before installing any kind of chimney pipe. There are two options: Run the pipe up and then turn it 90 degrees to the wall, or put in straight upwards from the collar to the ceiling. If you have obstructions from the ceiling, then the path should be to the wall. Run the pipe up through the ceiling if there aren’t any obstructions. The straight pipe offers efficacy and draft.

Parts That Match

Stove pipe requires additional components with the identical diameter as the pipeCollar adapter to connect the pipe to the stove, a thimble to connect the pipe to wall or the ceiling and a Class A.

See related

Removing In a Poulan Chainsaw

Small engines need maintenance to keep them functioning secure and well. The muffler on a Poulan chainsaw includes a spark arresting screen to keep sparks from leaving the muffler when contacting debris or wood chips, and causing a fire hazard. Carbon deposits build up on the muffler and spark arresting screen, and require cleaning to maintain airflow. Elimination of the muffler requires a minimal number of tools.

Release the trigger on your Poulan chainsaw. Slide the”On/Stop” button on the rear of the motor to the”Stop” position. Place the chainsaw and let it cool completely before doing muffler maintenance.

Insert a Phillips screwdriver into the three screws in the cylinder cover, turn them and remove them. Pull the cover. The muffler is revealed at the front of the engine near the hand guard. Eliminate spark plug boot from the plug on the leading of the engine.

Remove on the front of the muffler with an adjustable wrench. Pull the bolt the muffler. Eliminate the two muffler bolts with an adjustable wrench. Yank on the gasket, muffler and metal rear plate directly away and forward.

Place the muffler on a flat surface with the face down. Remove which are on the outlet cover pointing upward with a Phillips screwdriver. Pull the socket cover and spark arresting screen from the muffler.

Clean the spark arresting screen with a wire brush. Inspect the screen, gasket, muffler, and substitute them with brand new components they’re broken or if you can find cracks.

Replace socket cover and the spark arresting screen insert the two screws and tighten them . Place the plate on muffler, then the gasket and the motor front and tighten the two bolts with an adjustable wrench. Replace the bolt and tighten the locknut. Replace the spark plug boot, top cover and tighten the three screws with a Phillips screwdriver.

See related

How to Whitewash Cupboards

In a classic, shabby-chic or nation kitchen, whitewashed cupboards provide the finishing touch which sets your decoration in the period. Whitewash allows some of the natural grain to show through, providing the cupboards an authentic weathered look of the wood. Contemporary recipes do not include lime due to its caustic properties although whitewash is constructed of salt and lime. The paint you use does not need to be white, either the word”whitewash” can reference the painting technique, in place of the paint colour, so feel free to mix in different colors if desired.

Spread dropcloths on your work area. Unscrew the cabinet doors, and remove of the hardware, like hinges, hinges and handles. So that you know where one to place it back 16, label each door and hardware item.

Using a household cleaner and a cloth you plan clean of the surfaces of the cupboards. Rinse them and allow them to dry.

Strip any prior finish off or varnish employing an agent. Choose a agent according to what kind of finish or varnish you’re removing. Test several varieties if you do not understand what kind of stripper you need. The stripper using a cloth or brush, allow it to sit for the duration of time then scrape or wipe it off. Follow the instructions on the stripper’s label to ensure you’re using the product.

Sand the cupboards’ surfaces with a power sander equipped with sandpaper. Wipe the wood with a damp cloth to remove the dust.

On the cupboards in thin layers using a flat, wide brush paint the whitewash. To get a even coating, apply the whitewash along the direction of the grain; to get a less even desperate look, use it against the grain. Painting over any screw holesimmediately wash paint with a pipe cleaner. Allow the paint to dry.

Apply a second and third coat of whitewash if wanted, again cleaning the screw holes as you move. Allow the paint to dry completely. Sand it by hand with fine-grit sandpaper to smooth the outside out; to distress it further, sand the paint off on the corners and also in different areas according to a artistic preference.

Paint on a sealant to protect the whitewash and keep it smooth and clean. Allow the sealant to dry and cure according to the specifications on the label of the product.

Reassemble your cupboards.

See related

The Way to Eliminate Saved

It might be hard to understand why a previous owner would put in vinyl tiles on hardwood floors, but it occurs. Maybe the flooring was ruined, the tiles were installed to protect the ground or it was a design option. Regardless, eliminating vinyl backing after tile removal on hardwood flooring can be a challenge. If you realize potential and the beauty on your real estate and look past the issue, this home improvement project is worth energy and the time.

Peel away as much of the vinyl as possible. Put these pieces on a cloth or paper towel to ensure they don’t restick into the wood. Discard the old financing.

Heat the backing using a heat gun. Considering that the vinyl is eliminated and only the backing remains, it won’t take much heat to soften underlying glues and the backing. Avoid applying direct heat to areas where there’s only and no backing residual glue remains.

Hold a razor blade or putty knife level with the backing and put it away gently. Gouging the wood flooring surface with knife or the blade. Until you are sure it’s chilled after heating it don’t touch the backing. Peel pieces of backing away.

. A number of these goods are available in spray form and many others require you to pour a few drops of mist. Wipe the wood surface with fabric and the solvent. Apply light pressure and wash the surface in a linear motion. Wipe the floor clean with a cloth.

See related