Growth Stages of Ragweed

Native to the midwestern and eastern U.S., several species of annual ragweed (Ambrosia spp.) Have found their way west of the Rockies, including varieties that have developed resistance to common herbicides. Common ragweed (Ambrosia artemisiifolia) and associated species, banes of allergy sufferers, have different developmental stages. Many ragweed species germinate over prolonged, extended intervals, which makes them difficult control because neighboring plants can be at different phases of growth. The two primary phases of ragweed development, vegetative and reproductive, can be split further.

Seedlings

Ragweed seeds germinate anywhere as soon as the soil warms and moisture is present. In warm climates, that can be as early as February or March. The seedlings first appear as a set of oval, spoon-shaped cotelydons around 1/2 inch long. Clusters of seedlings often cover the soil surface in which seeds fell. Based on the species, one ragweed plant can produce 3,000 to 5,000 or more seeds. Ragweed seeds that were covered with disturbed dirt can continue to germinate throughout the growing season if moisture temperatures and conditions are appropriate. Annual ragweed plants have a long taproot and many fibrous roots, which makes them efficient at taking in water , even in sandy dirt.

First True Leaves

The ragweed’s first true leaves grow about five to seven days after germination when the seedlings are about 2-3 inches tall. These leaves are oval-shaped, simple leaves around 1 inch wide, arranged opposite each other on the stem. A second set of oval leaves rises above the first, also opposite each other on the stem but tilted in the initial pair.

Lobed Leaves

Following the second set of oval accurate leaves, the very first set of lobed leaves seems. Ragweed leaves are almost always simple, and typically in pairs arranged on opposite sides of the stem. Average lobed leaves have stiff, short hairs covering their surface. Ragweed plants tend to develop over neighboring plants, competing for light. Giant ragweed plants (Ambrosia trifida) growing as annuals in the exact same seed head may reach only 3 or 4 feet tall when competing with low-growing plants, but they can bend over taller plants at 7 to 8 ft in their hunt for sunlight.

Ragweed Reproduction

Ragweed plants are monoecious, meaning one plant has both male and female flowers. They could be in bloom for several months, from ancient adulthood until the end of the growing season. The male flowers are about the graceful spikes, known as racemes, that develop at the peak of the plant. The female flowers form in clusters on small stems just under the racemes. The male flowers on one plant can release as many as 10 million pollen grains. This enormous amount of pollen ensures greater genetic diversity — one reason for the fast spread of herbicide resistance through cross-pollination. Following the flowers are pollinated, ragweed seeds grow inside a pithy, protective husk. The seeds are distributed by hanging to sneakers, clothing, animals, and farm or gardening equipment.

Perennial Ragweed

Western ragweed (Ambrosia psilostachya), also a native perennial, rises in U.S. Department of Agriculture plant hardiness zones 6 through 10 and produces seeds and also spreads by rhizomes. It tolerates dry, sandy dirt and hot states, sometimes shedding its leaves during periods of stress, then recovering when conditions improve to rebloom and produce more seeds. Desert ragweed (Ambrosia dumosa) is another perennial species that grows in USDA zones 7 through 11. It is a little shrub about 2 feet tall.

See related

Are Pin Oak Acorns Edible?

Oak trees (Quercus spp.) That fall, reproduce by means of acorns or are harvested in large numbers by birds and squirrels. All acorns are edible, however they must undergo leaching to remove the tannin which makes them bitter. Acorns made by members of the white oak tree group are believed less bitter and sweeter-tasting than those of the red oak group, where the pin oak (Quercus palustris) is a member.

Pin Oak Facts

Hardy in U.S. Department of Agriculture plant hardiness zones 4 through 8, pin oak is native to the northeastern United States and southeastern Canada. Tolerant of moist soil, is grows to maximum 70 feet tall with a 60-foot-wide canopy. Its acorns have saucer-shaped, shallow caps and step 1/2 inch. Acorns of northern pin oak (Quercus ellipsoidalis) are somewhat longer, and each one’s cap covers almost half of this nut. Northern pin oak achieves exactly the same maximum height and spread as walnut and is hardy in USDA zones 4 through 7.

Leaching Truth

Their bitter flavor is removed by leaching acorns in water. One method requires putting the nuts, running them through the fine plate of an espresso grinder to form nut meal, soaking the nut meal in boiling water for one hour so that the water turns brown, and reboiling the nut meal into fresh water as often as necessary until the water remains clear. After the nut meal dries in a location that is warm and is ground another time, it is ready to use for baking and cooking.

See related

The Best Time to Destroy Rag Weeds from Moon Phase

A prolific pollen producer, ragweed (Ambrosia spp.) , blooms from midsummer to early autumn, spreading its allergens around. Growing to the Pacific by the Atlantic coast in a variety of habitats, such as areas, failed and cultivated landscapes and roadsidesreaches up to five feet tall, producing spikes of small flowers that drop pollen. Following centuries of training, the very best time to ruin this weed is when the moon is waning, from full moon through the last quarter, in accordance with the”Old Farmer’s Almanac” online.

Moon Phases

As the moon orbits the earth and the earth orbits the sun, the moon changes position in the sky in relation. The moon with regard to the sun’s place determines how much of the moon reflects sunlight. During the new moon, the side of the moon faces the ground. From the skies following the new moon, a small sliver of illuminated moon looks as the moon changes positions. Each night the amount of illumination increases, known as a moon, before the side of the moon facing the earth is fully illuminated, known as the full moon.

Waning Moon

After one night of full moon, the moon begins to wane. Each night, the illuminated side of the moon facing the ground decreases bit by bit, before the illuminated side of the moon is not in any way visible, known as new moon. The moon stages during the period are known as the dark of the moon. According to folklore, the dark of the moon is regarded as a period, as gravitational pull is decreased and moisture is not as abundant in plants or soil. When ragweeds lack vulnerability, cultivation or other control methods are more successful. The fourth quarter of the moon periods — the last quarter of the waning moon — is the most dormant period and the most optimum time for destroying weeds, writes Marion Owen, garden author, in her post”Planting by the Moon,” printed on Plantea.

Where and How Ragweed Grows

Many ragweed species grow as annuals all across the USA, with common ragweed (Ambrosia artemisiifolia) more prolific in the southeast than in other areas of the U.S. Common ragweed spreads by seeds, and to a lesser extent by rootstocks, as severed roots may send up new shoots. But, western ragweed (Ambrosia psilostachya) is a native perennial that grows throughout all U.S. Department of Agriculture plant hardiness zones. Western ragweed can spread so eradication of the ragweed species necessitates killing avoidance of seeding, in addition to the roots.

How to Destroy Ragweed

Tillage, or hoeing, is among the greatest approaches to ruin ragweed, which contain a brief taproot plus shallow fibrous roots. Ragweed is less inclined to re-establish itself by simply taking root . Mowing to maintain ragweeds low also interrupts the cycle that is developing and causes the weeds to eliminate .

Lunar Gardening

Scientific evidence for the benefits of gardening by moon phases, known as lunar gardening, is scant, says Sabrina Stierwalt at”Does Lunar Gardening Really Work?” Published about the Curious About Astronomy website. Nevertheless, lunar gardening was practiced for centuries by proponents.

See related

The Way to Germinate a Fuchsia Magellanica Seed

Fuchsia magellanica can also be known as the fuchsia, which grows well in USDA plant hardiness zones 6 to 9. This number does well when planted in full and watered. Mature fuchsias reach 10 feet in height and width and produce little winged blossoms that hang back. This plant attracts butterflies and hummingbirds to the landscape. Seed germination is erratic and requires 21 to 28 days.

Mix equal parts of potting soil, vermiculite and peat moss. When there are no holes, poke holes in a seed tray with an ice pick. Fill out the seed tray with the potting media and gently firm it down. Don’t compact the soil, which will make it impossible for the seedlings to root. Place the tray in a container of water until the surface of the ground is damp.

Spread the fuchsia seeds. Cover the seeds with a layer of potting soil and press the ground down. This ensures good contact between the seeds and soil. Mist the soil with room temperature water in a spray bottle.

Cover the seed tray with clear plastic to create a greenhouse. Place the tray in a hot place Fahrenheit, in bright, indirect light. The tray the soil on top looks dry.

Remove for two hours a day after the seeds sprout. Loosely cover the tray leaving room. Keep repeating this process. Transplant the seedlings after the fuchsia plants are 2 to 3 inches tall.

See related

How to Plant Lavender Beneath Citrus Trees

Lavender (Lavendula) and citrus trees grow well together due to the protection every plant offers the other. Lavender loves sunshine but suffers from too much rain or high humidity. The canopy of a citrus tree keeps the rain and allows the sunlight. The oils in lavender oil act as a natural repellant such as flies, that may harm the fruit of the trees, for insects.

Growing Conditions

Lavender develops in U.S. Department of Agriculture Hardiness Zones 5 to 9. A lavender cultivar that does in the warmer climate is Spanish or yellow lavender. Trees, such as mandarin oranges, limes and lemons should be emptied to allow the sunlight to penetrate the canopy to the ground below. Trimming the branches of the tree permits space for your own lavender to grow. Lavender demands sunshine in the cooler climates, however the direct sunshine of a warmer or subtropical climate can damage the plant; so that the lavender isn’t damaged, the leaves of the trees filter the light.

Soil Preparation

Lavender demands a well drained soil with a pH level between 6.4 to 8.2 for optimum growth. The pH level is adjusted by adding lime to raise or sulfur to reduce the level. The inclusion of sand improves drainage, benefiting the lavender in addition to the tree. Lavender does not benefit from the inclusion of fertilizers, but it is possible to improve soil quality with compost or other organic matter. It’s likely to work the soil to a depth of four to six inches, letting the roots of the lavender although citrus trees have a root system.

Planting Lavender

The thickness of the lavender plants should stay exactly the same as when the plant was from the container. Placed approximately 12 to 14 inches away from the tree’s base, the plants get the sun and rain. Until the plant is established the roots of the lavender should stay moist. When the plant has established itself at the growing 14, lavender is drought tolerant. Undergrowth and weeds deplete the nutrients and moisture required by the lavender throughout the growing season.

Care

Lavender plants stay in bloom. If transplanted further from the base of the tree, the plant shows signs of wilting when there is not enough sunlight reaching the lavender and might benefit. The citrus trees defy pruning in the winter months to allow more sun to penetrate the canopy. Yellowing leaves means water is being received by the plant. Sand raises drainage. Lavender plants stay full when pruned back to a height of six to eight inches each two or three decades.

See related

The Way to Grow Orchids in Low Humidity

If you’re selling your home, orchids can add color and elegance and might add allure. The species thrive in states and have temperature and humidity requirements. The University of Nebraska in Lincoln states that depending on the species, orchids prefer temperatures between 55 and 80 degrees and relative humidity between 80 percent and 40 percent. In dry conditions, moisture is lost by these crops through pores. If your home has a low relative humidity, you can easily maintain humidity levels for your orchid.

Prepare a humidity tray by putting pebbles and water in a tray, making sure that the water doesn’t reach the top of the pebbles. Place the container . To reduce root rot, the water must not touch.

Keep a humidifier. Use a humidifier that generates a mist so that the temperature will stay cool enough. A steam can make the air too warm for the plant.

Keep your orchid in a space that is always humid, such as the bathroom. In which the plant could receive moisture from water that is warm, you can place the orchid near your kitchen sink.

Arrange several orchids in a bunch, but don’t crowd the plants. The orchids will create a humid microclimate as they discharge moisture. Allow sufficient space between the crops for air circulation, which helps prevent bacterial and fungal diseases.

Cover the orchid with a transparent plastic jar when the air is dry. The traps the moisture produces a humid environment and produced by the plant.

Mist the orchid’s foliage in the daytime when the plant remains in a hot environment. To minimize the probability of fungal or bacterial growth, don’t mist from the afternoon or day, and don’t allow standing water to stay in the container.

See related

Fantastic Lakes Gardener's April Checklist

Fantastic Lakes gardeners are nearly giddy with all the things to see and do in April. The garden bursts into bloom, the garden facilities open with cool-season annuals beckoning and gardening starts in earnest.

Barbara Pintozzi

Welcome April Blooms

The larger bulbs take centre stage from the backyard in April, starting with daffodils, such as these sturdy Narcissus ‘Ice Follies’. They shrug off the April snow. Planting daffodils with early-, mid- and late-season blossoms extends the series.

Daffodils provide the most bang for your buck, as they are poisonous and mammals do not consume them, and they reunite reliably. They may be rejuvenated by dividing crowded clumps.

Barbara Pintozzi

When it would not be spring without large tulips, that the small-species tulips, such as this Tulipa humilis var. Violacea, are much more perennial. Like larger tulips, little species require protection from deer, squirrels and rabbits.

Minor bulbs squill (Scilla siberica), grape hyacinth (Muscari sp) along with attractiveness of the snow (Chionodoxa sp) make good companions for larger bulbs.

Barbara Pintozzi

Woody plants start blooming in April, beginning with forsythia (revealed) and continuing with flowering quince (Chaenomeles spp) and the native serviceberry (Amelanchier canadensis).

Forsythias look best in their natural form. There is no need to shear them to keep size when there are many good dwarf cultivars available to fit in the smallest backyard without pruning.

Barbara Pintozzi

Some woody plants have blossoms that cologne the April backyard, including Korean spice viburnum (Viburnum carlesii) and celebrity magnolia (Magnolia stellata), revealed.

Frosts and freezes can harm the delicate blossoms of magnolias, therefore be careful to site them at a safe location.

Barbara Pintozzi

Cherish Woodland Natives

Now is the perfect time to visit your nearest wooded area, be it a park, arboretum, botanical garden or character place, to visit woodland wildflowers in their glory.

Native spring ephemerals sprout and bloom beneath trees before they leaf out, for instance, tiny trout lily (Erythronium albidum), a species related to the showy exotic dog-tooth violet (Erythronium dens-canis), which also blossoms in April.

Barbara Pintozzi

The larger native bluebells (Mertensia virginica) bloom a sea of blue, then vanish. To prevent holes in the garden left by vanished spring ephemerals, plant hostas in front of them. The hostas will leaf out following the blooming display has ended.

Barbara Pintozzi

Native wildflowers (Thalictrum thalictroides, aka Anemonella thalictroides) are not emphemeral under moist conditions and may rebloom in fall in partial color.

Similarly, bloodroot (Sanguinaria canadensis) blossoms in April, and its foliage may persist into fall to turn butter yellow under suitably moist conditions.

Barbara Pintozzi

The Egyptian hepatica (Hepatica nobilis var. Obtusa) blossoms against the dark reddish old leaves prior to the green foliage emerges. In moist areas, skunk cabbage (Lysichiton americanus) and marsh marigolds (Caltha palustris) create their appearance.

These wildflowers can be good garden plants if you plant them in areas in your backyard that fit their preferred habitat.

See more Great Lakes native plants

Barbara Pintozzi

Remember April Garden Tasks

Sow cool-season annuals and edibles.
It’s time to sow cool-season annuals and plants, such as this ‘Merlot’lettuce (Latuca sativa), spinach(Spinacia oleracea), kale(Brassica oleracea) and peas(Pisum sativum). All these cool-season edibles can be sown in containers for an earlier crop.

Make certain the soil is workable prior to digging. To determine whether the soil is workable, gather a small amount into a ball in your hand. If it breaks apart easily, digging might start. If, however, the soil remains in a bulge, working it would harm its construction, and compacted soil hinders a plant’s ability to grow.

Barbara Pintozzi

Plant spring annuals in containers. If a trip to the backyard makes you unable to await the soil to be workable, plant spring annuals, such as pansies (Viola x wittrockiana) and Persian buttercup (Ranunculus asiaticus, revealed), wallflowers (Erysium), inventory (Matthiolia longipetala) and snapdragons (Antirrhinum majus) in containers.

Once the soil is workable, perennials from the backyard can be added to the containers for a season-long screen.

Barbara Pintozzi

Welcome Wildlife

Butterflies create their first appearance in April, such as this painted woman on squill (Scilla siberica). Leave bare tiny areas of somewhat depressed soil from the backyard where butterflies can drink from mud puddles. Permit some native violets (Viola sororia) to remain in the yard for frittilary butterflies to use as host crops.

Migrating hummingbirds reach the Fantastic Lakes in April. Hang out feeders for them now.
Put plain sugar from the feeders; do not use anything with red dye in it, which may harm them. Change the nectar every three or four times in cool weather and every day after temperatures reach the 80s. Don’t forget to hang the claws at precisely the exact same location each year so that the hummingbirds can discover them.Clean nest boxes for other birds and provide nonsynthetic lint, string or hair in netting bags for birds to use as nesting materials.

Take time to observe the backyard and its occupants every day: Things change so quickly in April, you can almost see the crops growing.

More ways to bring wildlife into your backyard

See related

Great Design Plant: California Fuchsia Brings Color and Hummingbirds

Until a couple of decades back, the only place I remember watching California fuchsia (Zauschneria californica)has been 7,000 ft high near Echo Summit, as patches of red blazing through cracks in gray granite boulders. Today it’s possible to see California fuchsia at your neigborhood nursery, possibly even Home Depot (Monrovia, the big wholesaler, grows and distributes a number).

California fuchsia has been tamed, losing the majority of its scraggly, crazy look but maybe not its bright color and toughness. It’s a reliable summer perennial for dry spots, particularly slopes. Hummingbirds love this, and also the plant depends on them.

Explore more blossoms | Garden ideas for your U.S. region

Waterwise Landscapes Incorporated

California fuchsia is a sun-loving perennial that is native. It receives its name from the form of the largely orange or crimson flowers, very similar to the common fuchsia — but it does not have the common fuchsia’s preference for cool, shady places.

Botanical name: Epilobium canum (or Zauschneria californica)
USDA zones: 6 to 9 (find your zone)
Water necessity: Light
Light requirement: Complete sun
Mature dimension: Greater than 1 foot to 4 feet tall and up to 4 ft wide, depending on variety

Distinguishing attributes. Tubular flowers arrive in bright orange or crimson. Leaves are grayish and small. Choose from a number of types of California fuchsia. Newer varieties, specifically, are long flowering. ‘Bert’s Bluff’ is orange red. ‘Ghostly Red’ gets the purest red blossoms and fuzzy gray-green leaves. Others include ‘UC Hybrid’ (developed at UC Davis) and ‘Calistoga’ (orange-red).

The best way to grow it. Plant it in autumn or early spring, so the roots can establish before warm weather. Make sure drainage is quick. Water it regularly (weekly or 2) during the first growing season. Once the crops are established, cut back to watering only as needed. Prune back based plants almost into the floor in autumn after the blossom season. Lightly prune the branch tips in spring to encourage bushy growth.

Monrovia

The best way to use it. For flashes of color, particularly during late summer and early autumn, when other crops fade, unite California fuchsia (revealed here is ‘Ghostly Red’) with mass plantings of other natives and Mediterranean plants. Line a path with it. Let it spill over a stone wall or boulders.

More: What to do in your region now | Browse thousands of landscape and garden photos

See related

Cedar Tree with Brown Pods

When your Eastern red cedar tree (Juniperus virginiana), an evergreen conifer that typically contains bluish, fleshy, berry-like cones, suddenly develops structures that resemble hard brown apples, you wonder what is happening. The growths, sometimes referred to as cedar apples or incisions, come from the fungus infection known as cedar-apple rust. The fungus can happen anywhere cedar and apples (Malus spp.) grow near each other. It requires both kinds of plants to complete the rust’s life cycle. At times the cedar’s health is not affected, but the disease can damage or kill both trees.

Beginning Period in Cedar

Although Eastern red cedar, which grows in U.S. Department of Agriculture plant hardiness zones 2 through 9, is the most vulnerable to the rust, ornamental junipers can also be hosts. The rust’s life cycle begins in summer when a spore blows from an infected apple to a cedar leaf. The fungus grows slowly at first, developing a small, greenish-brown swelling from the next summer. That fall, the swelling enlarges to the cedar apple, which can be a gall, or abnormal plant growth prompted by substances from another organism. It can be kidney-shaped or rounded, and can be 1/4 to above 2 inches broad. The surface has small depressions like golf ball dimples.

Fruiting Period in Cedar

Another phase is showy, with activity beginning in spring. Warmer temperatures and spring rains prompt growth of orange, gelatinous-looking horns that protrude from every dimple on the gall. Rather ornamental contrary to the green cedar foliage, the horns produce the reproductive spores that fly around the end to an apple tree. After spore release, the horns die as well as the cedar apple dries up, frequently falling to the ground.

Apple Tree Infection

Not just edible apples (Malus domestica), which are hardy in USDA zones 3 through 8, are affected, but crabapples (Malus spp.) Can also host cedar-apple rust. Crabapples grow in USDA zones 4 through 8a. Spores in the cedar tree gall land on an apple fruit or leaf and begin to feed on the tissues, developing yellowish circular spots. The fungi then form black fruiting bodies at the center of these areas, and insects cross-fertilize the dark spots. Then the last life stage grows in the dark spots, producing small, white, tubular constructions. These release the spores that cycle back to the cedars, typically at June through August. The apple tree loses leaves, fewer apples form and apples can be small or misshapen.

Reduce the Effects

If there are not too many cedars growing within a period of an apple tree, remove all of the cedar galls before they form the star-like reproductive phase. Since red cedar is the most susceptible host, plant rust-resistant species of juniper rather than red cedar. Cultivars of apple and crabapple can be found that are immune to cedar-apple rust. If you can, reduce the number of junipers that grow near apple trees, and maintain junipers as far away from apples as you can. For the disease not to be able to transmit back and forth, nevertheless, they would have to be just two miles apart.

See related

The Way to Get Your Own Prairie On

I must admit the first time I saw a prairie wasn’t before the spring of 2007, when my wife and I were looking for a wedding reception venue. We finished up at Spring Creek Prairie, a never-plowed 800-acre remnant 20 minutes south of our city. I am unsure how I heard of it but I know that ever since that time, the prairie has had a special spot in the lives of my wife and I, especially as we think about buying some acreage and starting prairie-inspired companies.

Here in town you will find plans to make a 7-mile prairie road from a bison park near our home down to Spring Creek. Just 1 percent of the tall-grass prairie remains, I wonder just how my garden might be an extended part of this trail — and what my small suburban lot means in a world of wildlife and individuals where gardens have become refuges for us all.

Benjamin Vogt / Monarch Gardens

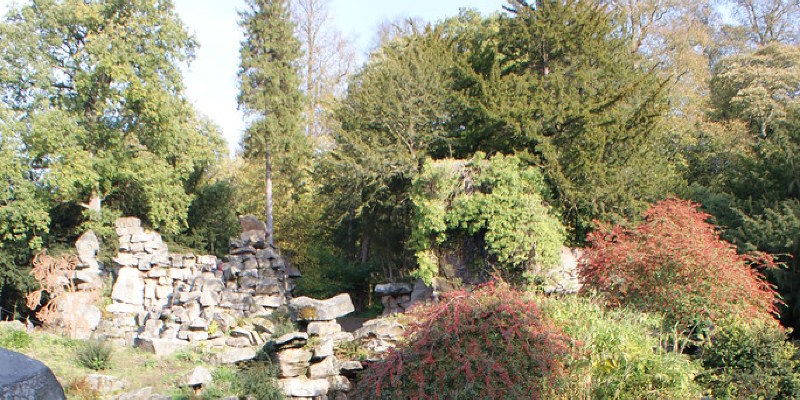
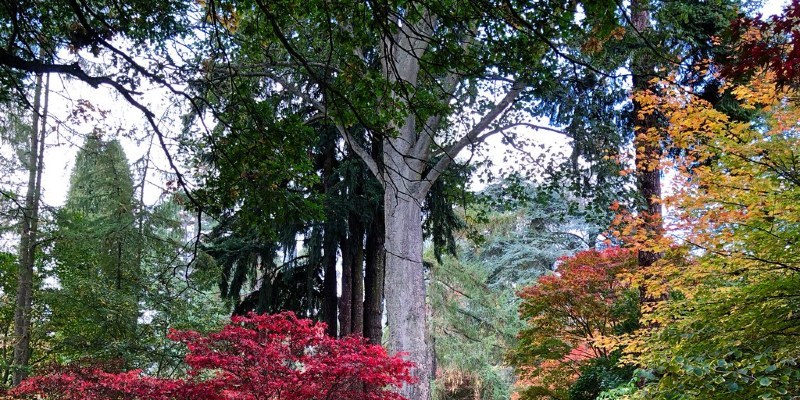
It’s difficult to imagine just how big the prairie used to be in the North American Great Plains and Midwest — covering nearly 50 percent of the U.S. — and just how quickly it disappeared over the span of a hundred decades or so. When I visit refuges in Kansas, Oklahoma and Iowa, I feel something I never feel elsewhere — that distance to the horizon that comforts me as the grass sways like waves, the birds leaping through folds of bluestem, insects rebounding from crazy bloom to crazy bloom. I need some of that in my own landscape. I need prairie back, and maybe if I am lucky I will observe the birds and insects come home, too.

Feldman Architecture, Inc..

In case you have a few acres that are full of weeds, the easiest way to prep for a prairie is to till the soil to expose the roots to air or broadcast the area with something like Roundup. I know that it’s not ideal to utilize the latter, but I wonder whether the ends justifies the means — you need a fresh slate to disperse a prairie seed mix, and that mix must be spread onto bare soil. A lot of those seeds also need a period of cold, wet winter weather to germinate in late spring, which is why a late-fall planting (after a couple pops) is perfect.

Here is a detailed prairie establishment guide by Prairie Nursery — by prairie prep to seeding, establishment and upkeep.

Jocelyn H. Chilvers

OK, you do not have a couple acres; maybe you have a bigger suburban lot. You are able to turn that into prairie too, with seed combinations, which would be the most economical method to get a diverse planting — although it is going to take a few years to establish a prairie, and you are going to have to spot check for weeds before the natives crowd them out. After that the plants will probably be quite low maintenance, requiring just an early-spring mowing (or a burning if you can do it safely).

Frequently spaces under trees are bare, and grass can not grow, but you will find shade-loving wildflowers and grasses on the market — two of my favorite places to find those plants would be the searchable database at the Lady Bird Johnson Wildflower Center and the internet shop at Prairie Moon Nursery.

Gardens from Gabriel, Inc..

And now some of you’re thinking, “Hey, I don’t have some acreage or even a suburban lot, and all I need is a low-maintenance some thing on a problem area that gets lots of sunlight and dries out frequently.”

Maybe you are able to mass some sideoats grama (Bouteloua curtipendula) or prairie dropseed (Sporobolus heterolepis). Those are two of my favourite prairie shortgrass plants. If you prefer blooms that are taller, think about some racks of bluestem (Andropogon spp) orIndian grass (Sorghastrum nutans) — you might even possess the taller grasses from the back and the shorter ones up alongside mimic a more traditional garden layout. Toss in some coneflowers, blue lavender or liatris (Liatris aspera) for some pops of flowering color from early summer to midautumn, and you’ve started cooking up a prairie.

If you have a shadier place, research native sedges — they look like grasses but are not as tall.

D-CRAIN Design and Construction

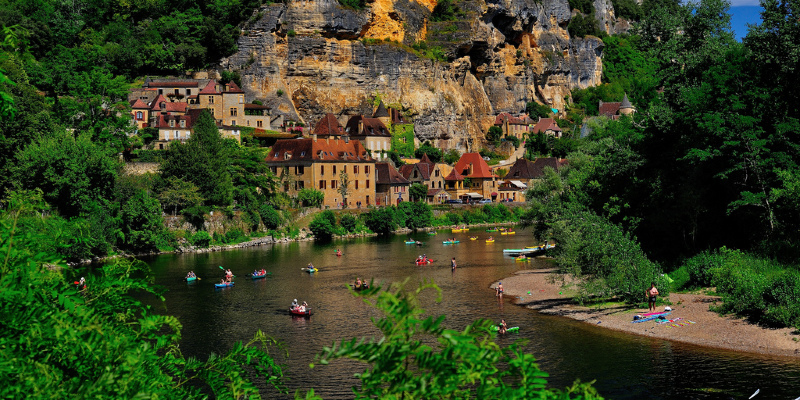
You can even get really minimalist if you want. Inside this picture various plants are dispersed almost like they’d be in the arid high plains crazy — a specimen here, a drift there. Designing a prairie garden can spur some trendy imagination, and I strongly think any aesthetic can be achieved using just prairie grasses and wildflowers.

Benjamin Vogt / Monarch Gardens

Here’s a midfall scene from my own garden. Front is a liatris gone to seed, behind it’s a ‘Purple Dome’ New England aster cultivar, and further back is a stand of tall Indian grass. This layout is really a bridge between the formal and informal look I believe prairie plants lend themselves to quite well.

Benjamin Vogt / Monarch Gardens

Here is another view from a very different part of my backyard, at USDA zone 5 (find your zone). Above is a stand of gray-headed coneflower, purple coneflower, long-headed coneflower and yarrow. Sprinkled in you will find some zizia, little bluestem, liatris, milkweed and a plethora of other prairie plants at a 40-square-foot mattress of running colour from May to October.

Christopher Yates Landscape Architecture

If you merely need a lawn replacement, then a seeding of buffalo grass or even blue grama works good for a 6- to 8-inch insure you can also mow once in a while if you prefer (but consider allowing it to grow to form a natural, wavy habit). Prairies in our landscapes do not have to be tall or complex or cluttered.

Great grasses for a new lawn

Kathleen Shaeffer Design, Exterior Spaces

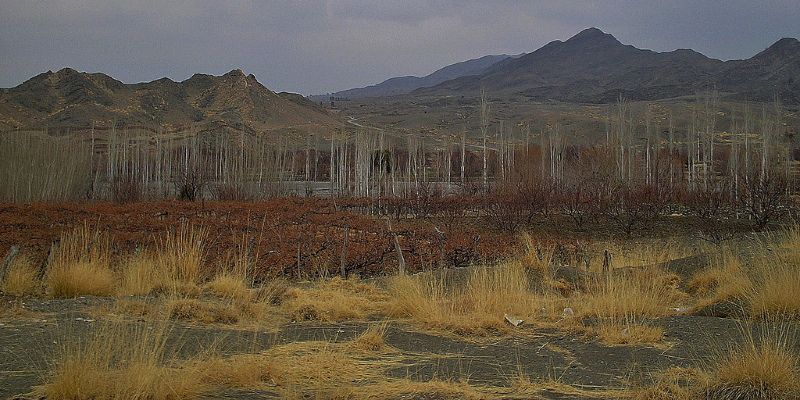
If you live in a cooler climate or at higher elevation, you are able to stretch the rules a bit and allow red fescue grow and make undulating waves 4 to 6 inches tall. A couple well-placed trees from the grass make a playground- or prairie-like feel and are extremely low maintenance.

Mark English Architects, AIA

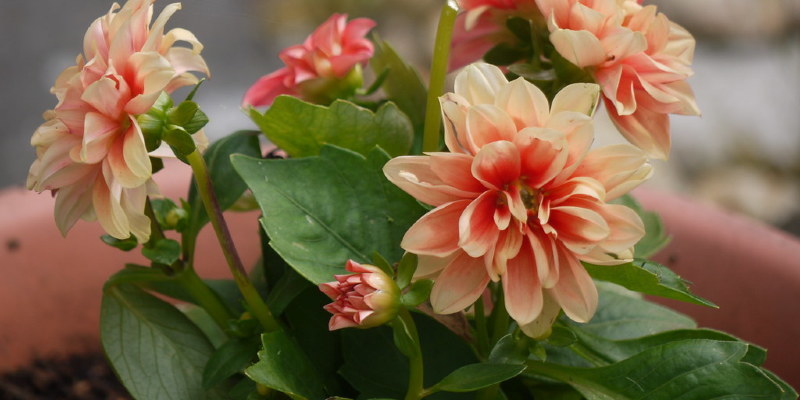
Why not give some baskets the prairie look? You might seed the containers, but buying some nursery plants may be most suitable for you, so you get a quicker bang for your dollar.

Another planting proposal: Have pleasure and layout one container with some little bluestem (Schizachyrium scoparium) underplanted with purple prairie clover or stunt blazing star (Liatris cylindracea). You may need to put the container into the garage or shed for winter so that the roots do not freeze or shut out, especially if you live in zone 5 or even a cooler climate.

There was all kinds of prairies from the U.S.: inland, lowland, sand and even some on the Gulf Coast from Texas to Florida.

There are prairie plants for virtually any type of environment, from wet to dry. You can go all out having a diverse seed mix, make traditional beds or get modern with just blossoms. Match the layout to your home and maybe pick up Catherine Zimmerman’s publication on meadow gardening, Urban and Suburban Meadows.

Prairie plants are low maintenance when correctly sited, and once established feed all kinds of beneficial pollinating insects, enhance soil fertility and revive a little bit of what was formerly here for lots of species that still rely on native prairie plant communities.

Every small garden landscape, when connected, becomes a prairie corridor for miracle and for life you maybe didn’t know was there till you welcomed it back home.

More: 3 Ways Native Plants Create Gardening So Much Better

See related